Welcome

I am constantly amazed at how animated and talkative people get when you mention food. The mere aroma of certain foods can evoke memories that transport us back to a special place and time. Food can bridge the gap between all ages, races and ethnicities.
Let's face it, the only thing that should ever come between people is a table and some serving bowls.

Thursday, March 29, 2007

A Taste Of Rochester, New York

When my grandparents retired to Florida they learned that some of their favorite Rochester foods weren't sold in Florida. A huge favorite of theirs
“Zweigles Hots”
especially their white hots. These hots pop when you cook them and pop when you bite into them and they have a flavor like no other.
When my grandparents came to Rochester for a visit they would buy a box of Zweigles white hots and freeze them for their trip home.
Well now there is a place online that sells many of the foods that Rochester is known for and they will deliver them right to your door, anywhere in the world. The place is called; “NewYorkStyleDeli.com
Living here all my life I sometimes take for granted all the wonderful foods that Rochester is famous for. If you are from Rochester or have ever visited you already know how great these products taste. For those who are unfamiliar with some of these local goods, give them a try. You will not be be disappointed.
Tuesday, March 27, 2007

De-Liver-ance

The one thing I always had trouble eating when I was younger was liver. Specifically beef liver. I loved chicken livers, especially when my mother made chopped liver just like what we would buy at the Jewish Deli. The majority of my family would actually crave liver and onions. For some reason just the smell would send me running the other way.
My mother and grandmother would always soak the raw beef liver in milk for a few hours or overnight before cooking. They said it would take away the strong odor and taste………yeah, right! I’d always try it, but just didn’t like it.
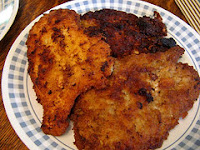
One day at my grandmothers house she said;” Julie I made a batch of cutlets, have some”. I love cutlets, so I said yes immediately. My grandmother made cutlets out of everything;” Chicken, pork, beef, catfish and tilapia, each one delicious. So as I was munching on the room temperature cutlet, which tasted fabulous by the way, my grandmother says;” I thought you didn’t like beef liver”? I don’t! Well you must like it, because that is what you are eating.
I was in shock, my grandmother tricked me……oh who cares, that was the best beef liver I ever ate.
I still to this day prepare my beef liver cutlet style but my tastes have grown, I can now eat plain old liver and onions with a smile on my face.

Beef Liver Cutlets

6 medium to large slices of beef liver

3/4 cup Italian breadcrumbs (add some fresh or dried basil and parsley to the crumbs for extra flavor).
1/4 cup freshly grated parmesan cheese
2 eggs
2 tablespoons butter
2 tablespoons olive oil or vegetable oil
1/2 teaspoon salt and freshly ground pepper

In a shallow bowl mix the bread crumbs, Parmesan cheese, salt, and pepper.
In another shallow bowl, beat the eggs. Dip the beef liver in the eggs, then in the crumb mixture. Place the crumbed cutlets in the refrigerator until nearly time to serve. In large skillet, heat butter and oil over medium-high heat until hot. Cook cutlets on each side until golden brown, about 2-3 minutes per side.

This can be adapted for use with any meat or fish. If using meat or chicken, pound between plastic wrap to flatten out and tenderize. No need to pound the liver or fish.

Monday, March 26, 2007

Sunday Gravy

My Great, Great Grandparents
Mama Rose and Poppy

When my great great grandparents came to America from their beloved Italy, they endured many prejudices as was the case with all people of different ethnic backgrounds and religions. They had to work very hard for very little pay. They swept floors, did other peoples laundry and ironing. Times were hard but never the less they loved this country and were willing to work hard and raise a family. Even though money was scarce the dinner table was rich with tradition and love. The love of food bridged many differences between people through the ages. I’ve always been amazed at how you can place a variety of foods from many different cultures on one table and it exudes love and togetherness. It’s too bad that placing many different cultures on one planet does not do the same.
Growing up I remember all the wonderful smells coming from the kitchen, especially on Sunday. What we all commonly called sauce would be simmering on the stove in the wee hours of the morning. The smell would drive us nuts along with the smell of the meatballs frying. It was only a matter of time before those wonderful aromas got the best of us. My great Aunt would get some fresh bread from the bakery and we would start breaking off pieces of the bread and dunking it in the pot of sauce. My grandmother would lovingly yell at us to stop dunking. She would make each of us a meatball sandwich to hopefully keep us out of the pot of sauce until dinner. Actually it really wasn’t sauce at all it was“Sunday Gravy”. This is what it is truly known as in Italy. The meat from the Sunday gravy which always consisted of;” Meatballs, pork ribs, Italian sausage and pork hocks”. Was always served on a separate platter. My grandmother told me that in Italy they really do not do Spaghetti and meatballs that is actually an American interpretation of the dish. In Italy the meatballs are more a main dish to be served with salad or potatoes.
Here is an old recipe that I dug up. Make extra and freeze it. Your house will smell like a little slice of heaven and fill your senses with love.

Italian Sunday Gravy

Ingredients:
2 large cans of tomato puree
1 6oz. can of tomato paste
1 quart chicken or beef stock
2 cups of dry red wine
¼ cup olive oil
2 yellow onions peeled and minced
½ cup chopped parsley
6 garlic cloves, chopped
½ pound of fresh mushrooms, chopped
½ teaspoon of crushed red pepper flakes
1 tablespoon of oregano, crushed
1 teaspoon dried basil or 3 times as much fresh basil
½ tablespoon salt
1 teaspoon sugar
1 pound pork neck bones (this is what truly adds that special flavor)


Directions:
In a large pot, place tomato puree, tomato paste, chicken or beef stock and the wine. Heat a frying pan and add the olive oil. Sauté the onions and garlic until soft but not too brown (or else it will taste bitter) Add to the pot along with all the remaining ingredients. Bring to a light boil and then turn to simmer. Simmer for 2 hours partly covered, stirring often. Remove the bones and discard (or save as a snack for yourself)
Skim the fat from the top and discard, store in the refrigerator or freezer
Makes 3 quarts

Friday, March 23, 2007

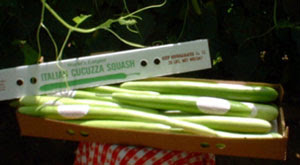
Italian Cucuzza

Pronounced: ku-KOO-za.
A real Italian favorite. Cucuzza is a squash that can be cooked as you would most other varieties of squashes. The flavor of cucuzza is a cross between yellow squash, zucchini and cucumber. Cucuzza must be peeled before it is cooked, the seeds are edible much the same as cucumber seeds.
Cucuzza actually means squash in Italian so it can refer to any variety such as zucchini, summer squash, butternut etc. But the actual italian cucuzza variety can grow up to three feet long and is lime green in color. As with most varieties they can be prepared in a multitude of ways; “fried, steamed, baked. They can be used in savory cooking as well as desserts.
If you cannot find the Italian Cucuzza squash you may substitute zucchini. But if you can find it give it a try.

Stewed Cucuzza

One 15 oz can stewed tomatoes
2 lbs cucuzza squash peeled and cut it to bite sized chunks(if using zucchini there is no need to peel)
1/4 tsp salt
1 clove crushed garlic
1 onion chopped
1 tbsp oil
1/8 tsp red pepper
1/2 tbsp oregano
1 lb ground beef or ground turkey is optional (but really adds so much more to the dish).

Place oil in a large skillet and sauté chopped onions. Add meat and brown. Season with your salt, red pepper and oregano. When meat is almost cooked, add stewed tomatoes. Simmer for about 10 minutes. Stir squash into mixture and cook for about 30 minutes more or until tender. Serve plain or over spaghetti with Romano cheese.

Thursday, March 22, 2007

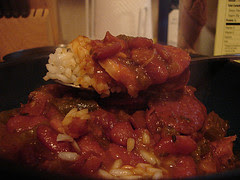
Puerto Rican Red Beans and Rice


For the first seventeen years of my life I grew up in the city of Rochester NY. It was like a melting pot of ethnicities. One of my childhood friends was from Puerto Rico her name was Lourdes. Her mother made the most amazing food. Luckily she lived on my street and her mother was friends with my mother so I was able to go there from time to time for dinner. This was one of my favorite dishes
That her mother would prepare.


1/2 cup chopped onions
1/2 cup chopped lean ham
1/2 cup green bell peppers
1/2 cup chorizo sausage
1 tablespoon olive oil
2 cloves garlic, minced
1 teaspoon ground cumin
1 (19 ounce) can red kidney beans, rinsed
1 (8 ounce) can unsalted tomato sauce
1 tablespoon Tabasco Sauce
2 cups uncooked white rice
1/2 teaspoon salt

Heat oil in a large saucepan, set to medium
Add ham, chorizo, onion and green pepper, garlic and cumin.
Sauté until vegetables are tender.
Add beans, tomato sauce and Tabasco sauce.
Simmer for 5 minutes.
Add in remaining ingredients and 4 cups water.
Bring to boil.
Reduce heat, cover and simmer until rice is tender.
Don’t forget to leave the Tabasco on the table for those who want to add more heat.

Wednesday, March 21, 2007

Touch of Spring


Strawberries and Rhubarb have always been a perfect marriage of flavors. The most popular and most well known of course is; “strawberry rhubarb pie”.
Did you know that a half-dozen plants will provide enough rhubarb for a family of four?
Something to think about for that backyard garden.
My mother use to make what we called; “rhubarb sauce” which really was applesauce without the apples. We really loved the rhubarb sauce as a side when we had pork chops for dinner. It was also great poured over vanilla or strawberry ice cream.
Rhubarb is just one of those economically sound ingredients with limitless cooking potential.
To welcome in spring here is a recipe that is easy to make and even easier to eat.

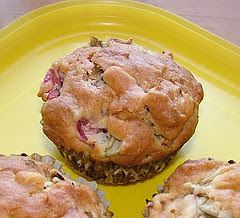
Touch of Spring Muffins

2 cups all purpose flour
½ cup sugar
1 tablespoon baking powder
½ teaspoon salt
1 egg
¾ cup of milk
1/3 cup vegetable oil
½ cup sliced fresh strawberries
½ cup sliced fresh rhubarb
Topping:
2 teaspoons of sugar

In a large bowl, combine flour, sugar, baking powder and salt. In another bowl, beat egg, milk and oil until smooth. Stir into the dry ingredients, just until moistened. Fold in strawberries and rhubarb.
Fill greased or paper –lined muffin cups three fourths full. Sprinkle each with a little sugar before baking. Bake at 375 degrees for 22-25 minutes. Cool for 5 minutes before removing from pan to a wire rack. Serve warm.
Makes 1 dozen muffins

I also thought that I would include my mother’s recipe for Rhubarb Sauce…..enjoy.

Rhubarb Sauce

Ingredients:

4 cups rhubarb chopped
3/4 cups sugar
1/4 cups water

Place all these in a saucepan; cover, and let simmer over medium heat until all the rhubarb has melted down(about 20-30 minutes).
You may also add additional flavorings such as cinnamon or ginger, the choice is yours. We just had it as is.

Here is an interesting tip regarding color; if you peel the rhubarb your sauce will be green, if you leave the peel on, your sauce will be red. No matter which method you choose the taste will be the same.

Monday, March 19, 2007

Spaghetti by Sophia


I had to share this recipe with all of you, I watched Sophia Loren make this on a talk show awhile back. I can’t tell you how often I make this; it is so easy and delicious. It’s perfect when having company; all you need is bread and a salad for a complete meal. You only need the stove to heat the water for the pasta.
I tweak a few things when I make this such as;” I use Farfalle(bow tie) instead of spaghetti. I also prefer to use boccacini (little mozzarella balls) instead of sliced. I also add a few different kinds of pitted olives. For a touch of meat try some thin sliced prosciutto”. But trust me, there is no need to change anything, it is great just the way it is.


Spaghetti con Pomodoro Crudo* (Spaghetti with uncooked tomato sauce) from "Sophia Loren Recipes & Memories" (GT Publishing). "

This is cool and refreshing, excellent for summer," says Loren. "Serve with chilled white wine."Makes 6 servings

1-1/2 pounds spaghetti
2 pounds tomatoes, not quite ripe, chopped
1/2 pound mozzarella, thinly sliced
2 medium red or Vidalia onions, thinly sliced
1/4 cup pitted Sicilian green olives, roughly chopped
2 tablespoons drained capers
1/4 cup minced Italian parsley
10 to 12 chopped fresh oregano leaves or 1/4 teaspoon dried
1 to 2 cloves garlic, crushed
Salt
Freshly ground pepper
1/3 cup extra-virgin olive oil
Freshly grated Parmigiano cheese (optional)

Cook the pasta until just al dente. While the pasta is cooking, place in a large serving bowl the tomatoes, mozzarella, onions, olives, capers, parsley, oregano, garlic, and salt and pepper to taste. Pour the oil over and toss gently.When the pasta is ready, pour into a colander and quickly rinse it under cold water; drain well and add the warm spaghetti to the bowl. Toss to combine, remove the garlic if desired, and serve. Pass the cheese at the table.

Friday, March 16, 2007

Happy St. Patrick's Day... a day early


I have nothing against green beer; I have tipped a few back many a time to celebrate. But I remember my mother and father ordering Irish Coffee while sitting at the bar even when it wasn’t St. Patty’s Day. My mother would say;” Even though it is strong from the Irish whisky
It’s also warm, creamy and smooth like a fine dessert”. It really is quite good, nice at the end of the day when you need to unwind. Enjoy

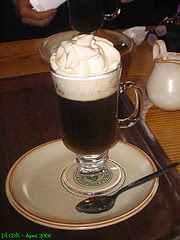
Creamy Irish Coffee

4 cups Strong fresh coffee
1/4 cup Sugar
1/2 cup Irish whiskey
1 cup Whipping cream
2 tbsp Sugar
2 tbsp Irish whiskey (yes you can add more)

Place 4 cups of strong fresh coffee in a saucepan with 1/4 cup of sugar or to taste. Add 1/2 cup Irish Whiskey and heat thoroughly but do not boil. (Scotch Bourbon or other whiskeys could be used.) Meanwhile whip 1 cup whipping cream until light. Beat in 2 tbsp each of sugar and Irish whiskey. Pour coffee into mugs or goblets and pipe or spoon flavored cream on top.


Some “IRISH TOASTS” to go along with that Irish Coffee;

  • May the saddest day of your future be no worse than the happiest day of your past.
  • May you live as long as you want, and never want as long as you live.
  • May your neighbors respect you, trouble neglect you, the angels protect you, and heaven accept you.


Thursday, March 15, 2007

A Sticky Situation


We often hear about foods that stick to your ribs. Usually it’s referring to comfort foods or hearty foods like stews with dumplings or ooey gooey macaroni and cheese. Anything that fills our stomachs and our emotions and delights our palates all at the same time.
But where is it written that food has to stick to your ribs to be good……..
Sometimes the best food in the world just has to stick to your fingers, sure it’s messy
But who says messy can’t be deee –licious.

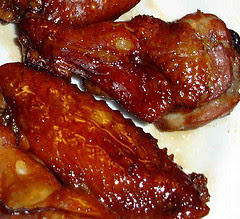
Raspberry Glazed Wings

¾ cup seedless raspberry jam
¼ cup cider vinegar
¼ cup soy sauce
3 garlic cloves, minced
½ tsp of cayenne pepper (if you prefer less heat just substitute black pepper)
20 whole chicken wings (about 3 pounds)

In a saucepan, combine jam, vinegar, soy sauce, garlic and pepper. Bring to a boil; boil for 1 minute.
Cut chicken wings into three sections; discard wing tips. Place wings in a large bowl; add raspberry mixture and toss to coat. Cover and refrigerate for at least 4 hours.
Line a 15”X10” baking pan with foil, heavily grease the foil. Using a slotted spoon and reserving the marinade place wings in pan. Bake at 375 degrees for 30 minutes, turning once. Meanwhile, in a saucepan, bring marinade to a rolling boil; boil for 1 minute. Reduce heat; simmer, uncovered for 10 – 15 minutes or until thickened. Brush over wings. Bake 20 – 25 minutes longer, turning and basting once, or until chicken juices run clear.

Wednesday, March 14, 2007

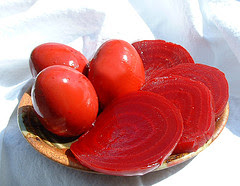
Pickled Beets and Eggs with vidalia onions


A friend of mine turned me on to these years ago and I have been hooked ever since.
This is an easy version using canned beets. You can use fresh but it really isn’t necessary the canned taste just as good. They keep really well 2 – 3 weeks in the refrigerator.
Makes a great quick side dish or add it to some mixed greens, the sliced eggs with the yellow yolk and ruby red whites make a beautiful salad.
My favorite way to eat them is with some chunks of blue cheese (I love blue cheese)
And believe it or not, beets and blue cheese go very well together.

Pickled Beets and Eggs W/ Vidalia or any Sweet Onion

1 (1 lb.) can beets (whole or sliced) drained, retain liquid
1 small to medium onion sliced and separated into rings (optional, but I like it with the onion)
1 c. vinegar
1/2 c. sugar(white, light brown or splenda) it’s up to you
3/4 tsp. salt
3 whole cloves
1 stick cinnamon
8 hard boiled eggs, shelled

Combine beet juice, vinegar, sugar, salt, cloves and cinnamon in saucepan. Bring to boil and simmer 5 minutes.
Put eggs and beets and onions in a plastic container that has a lid.
Pour hot liquid over beets, eggs and onions. Add a little water if needed to cover completely. Cover and store in refrigerator a day or two occasionally shaking the container so that the eggs color evenly. Then they are ready for you to eat and enjoy.
photo courtesy of Pockafwye/flickr

Tuesday, March 13, 2007

My name is Julie and I eat Cereal


I don’t know about the rest of you but as much as I love all the food that we
Blog about. Sometimes all I really want is a bowl of cereal. Yes, I said cereal,
I love it so much I sometimes have it for dinner. These days I go for the healthier brands
Although I am a big fan of; Frosted Flakes, Apple Jacks, Fruit Loops, Corn Pops and let’s not forget Cinnamon Toast Crunch. But since I am trying to eat healthier which means cutting back on my sugar. I now choose a high fiber bran cereal which I then add dried cherries or blueberries and some almonds or walnuts to. If I need it sweeter……thank goodness for Splenda (I prefer the brown sugar blend).
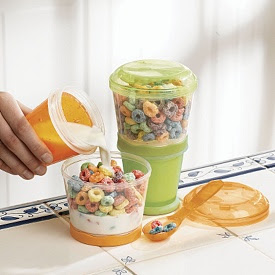
The only problem with cereal is it’s usually hard to take with you whether it’s to the office or the park. Well not any more, check this out;” Cereal-to-go”. A truly great product for the cereal lover in all of us.

Monday, March 12, 2007

Homemade Ricotta Cheese


Ricotta is so easy to make and the taste is so fresh and creamy that you may just reconsider ever getting store bought again. This is still great for eating and using in all your cooking maybe even better.
You will need a cooking thermometer.

Preparation Time: 45 minutes

Ingredients:
1 gallon whole pasteurized milk
1/3 cup plus 1 teaspoon distilled white vinegar
1/4 teaspoon salt (more if you want a saltier taste and if you are not going to use it for desserts)
Don’t forget Thermometer(temperature is key)

Directions:


  • Rinse the inside of the pot you intend to use with cold water (this helps prevent the milk from scorching). Place 1 gallon milk in large, heavy non-reactive pot on medium heat. Add salt and stir briefly. Allow milk to heat up slowly, stirring occasionally. Soon you will notice steam start to form above the surface and tiny bubbles appearing on the milk. You want it to reach 180-185 degrees, near scalding temperature, just before it comes to a boil. Check the temperature with your thermometer.


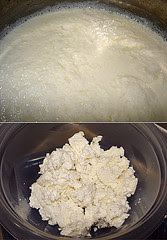
  • When it reaches the correct temperature, take the pot off the burner, add the vinegar and stir gently for only one minute. You will notice curds forming immediately. Cover with a dry clean dish towel and allow the mixture to sit undisturbed for a couple of hours. You can also begin preparing your ricotta in the morning before going to work and let it sit until you come home.


  • When the ricotta has rested for 2 hours or more take a piece of cheesecloth, dampen it and place it inside a colander. With a slotted spoon, ladle out the ricotta into the prepared colander. Place the colander with ricotta inside of a larger pan so it can drain freely. Let it drain for two hours or so depending on how creamy or dry you want your cheese to be.
    Lift the cheesecloth up by the four corners and twist gently. If the liquid runs clear, squeeze a little more. If the liquid runs milky, there is no more need to squeeze. Place in a tight sealed container. Refrigerate. It will keep for up to 7 days. Ricotta does not freeze well.
This recipe will give you 4 cups of ricotta cheese

Friday, March 9, 2007

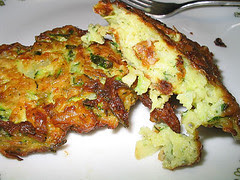
Zucchini Patties


My grandmother makes these at least a couple times a week if not more. My grandmother is a huge fan of bisquick, especially those impossible pie recipes that they have. These are also great made with
Those canned artichokes. My poor grandmother tries to have these as an extra side dish at the dinner table but by the time we’re all done munching they’re just about gone. These taste great hot or cold.

5 tbsp Bisquick
1/2 cup Parmesan Cheese
1/4 tsp Salt
1/8 tsp Pepper
2 Eggs, Beaten
2 tbsp Butter
2 cups Zucchini, Grated

Blend the bisquick, parmesan, salt, pepper. Add eggs. Mix zucchini into batter. Grease hot pan or griddle with butter. Pour batter into pan and fry 3 minutes on each side. Serve warm, a delicious way of serving zucchini. Makes 8 to 10 fritters.

Thursday, March 8, 2007

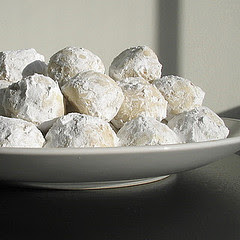
Russian Tea Cakes


Russian tea cakes are like little bites of butter. They are light and not terribly sweet considering that they are rolled in powdered sugar. I know not to make these if I am trying to count calories. This is a splurge recipe because they are totally addictive.
You will put one of these heavenly little gems in your mouth and moan…..they just melt.

1 cup softened butter or margarine
1/2 cup powdered sugar
1 teaspoon vanilla
1/4 teaspoon salt
2 1/4 cups all purpose flour
3/4 cup finely chopped walnuts

In a large bowl combine ingredients on low speed of mixer about 1 minute. Blend well. Gradually add flour at low speed until just combined; stir in nuts. Roll dough into 1 inch balls; place about 1 inch apart on non greased cookie sheet. Bake at 350 F for 8-10 minutes until firm to the touch but not brown. Do not over bake. While warm, roll in powdered sugar. Cool; re-roll in powdered sugar before serving.

Wednesday, March 7, 2007

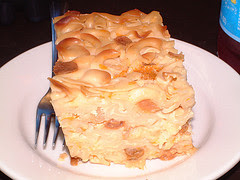
Noodle Kugel


This is a really easy and inexpensive dessert to prepare. If you are fortunate enough to have a kosher deli in your area you can buy Noodle Kugel already made. It will cost a great deal more but worth it if you just don’t have the time to make it yourself.
There are many variations to this recipe; different fruits or spices etc…but this is the one I grew up with and to this day is my favorite. My second choice would be one I had with canned pineapple chunks in it instead of raisins.

Ingredients:

8 ounces medium noodles
8 ounces cottage cheese
3/4 cup sour cream or yogurt, or half of each
1 cup milk
1/4 cup honey (or to taste)
4 tablespoons butter, melted
2 tablespoons wheat germ (optional)
1/2 cup raisins
Dash cinnamon
1 tsp vanilla extract

1. Cook the noodles according to package directions.
2. Preheat oven to 350 degrees F.
3. Grease an 11 x 14-inch baking dish well.
4. In a large bowl, combine all the ingredients, including the drained noodles. In a large bowl, combine all the ingredients, including the drained noodles.
5. Bake for 1 hour or until the top is golden and crusty.

Tuesday, March 6, 2007

The Daily Grind


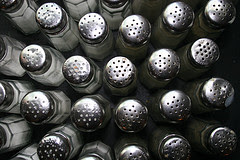
Plain old salt and pepper, think again. Salt and Pepper are as varied in colors and aromas
as are fine wines. They tease our senses and lift our palates to new heights.
This isn’t the salt and pepper that was on our family dinner table growing up.
The big decision use to be whether to serve red wine with meats or white wine with fish.
Now it could be red salt with meat or white pepper with fish. Do I want a smokier flavor or a more earthy taste. It’s not only flavor any more it is also texture. Certain salts don’t dissolve as quickly and leave a crunch others are flaked and melt instantly.
I like to put a little bit of coarse salt around the edges of my focaccia before baking. The soft dough and the crunchy salt are a nice combination.
Have fun, experiment the choices and combinations are endless.
Here are a few resources for your salt and pepper pleasure:


Monday, March 5, 2007

Creepy Susan's


My Great Aunt Mimi on occasion would take me to a very fancy restaurant to experience the etiquette and the culture. All those different forks and knives were a bit overwhelming to say the least. But she was patient and step by step helped me navigate a seven course meal.
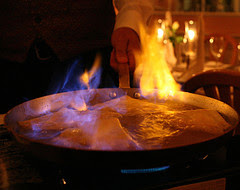
I remember that I was fascinated by something one of the waiters was doing at the next table. He had a little cart with a fry pan that had flames shooting out of it. The people at that table were oohing and aahing. I asked my aunt about it, she said it is considered very elegant to get your dessert done table side, like cherries jubilee or in this case she thinks they were making Crepe Suzettes. I had never heard of Crepe Suzettes but I sure was curious to know more. As we made our way through our meal my aunt asked me if I would still have room for dessert. I said yes.
When the waiter came to our table he asked; “would you ladies be interested in some dessert”? Before my aunt could utter a word, I said quite assertively; “I will have some of your Creepy Susan’s”. My aunt howled as did the waiter once she explained.
My aunt decided that we would both have the “Creepy Susan’s” the waiter put on quite a show for us while he explained each step of what he was doing. We oohed and aahed, I was so wide eyed with anticipation. When he put the plate in front of me he said; “Bon Appetit`”. The Crepe Suzettes were so good; they just melted in your mouth.


Crepe Suzettes:

¼ cup (1/2 stick) butter
peel of 2 oranges,thinly slivered
peel of 1 lemon, thinly slivered
¼ cup sugar
juice of ½ orange
juice of ½ lemon
1 tablespoon Cointreau
1 tablespoon Grand Marnier
2 tablespoons brandy
12 crepes

Melt the butter in a chafing dish or skillet. Add the orange and lemon peel to the pan and cook briefly until tender. Stir in the sugar, orange juice, and lemon juice; cook the sauce, stirring, until syrupy. Place the crepes in the sauce, three at a time. When the crepes are coated with the sauce, fold each crepe in half and then into quarters. When all 12 crepes have been added to the pan, pour the Cointreau, Grand Marnier, and brandy over them, and then tip the pan slightly to ignite the brandy. When the flames subside, place 3 crepes on each plate, and top with some of the sauce and citrus peel.
Serves 4

Friday, March 2, 2007

I Love Almond Paste


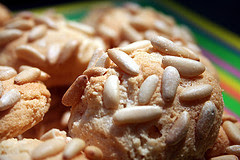
I have loved almond paste for as long as I can remember. Whenever their was a wedding I’d wait for them to put out the Italian cookie tray and pick out all the almond paste ones. There were usually four different types of almond paste cookies on the tray; Pignoli (pine nuts), Slivered almond, crushed cashew or the ones with the halved maraschino cherry pressed in the middle. If my grandmother and Aunt went to a wedding or a function that had almond paste cookies they would wrap some up in a napkin, put it in their purse and bring them home as a surprise for me.

These cookies do not store that well, so if you need to keep them longer than a couple of days, store them in the freezer and remove them as needed. If you bake the cookies a little less, you will have a soft cookie, bake them longer and you will have a chewy cookie. There really is no need to add flour to these cookies they will still turn out fine but by adding the flour it prevents the cookies from spreading leaving you with a more uniform cookie. When done these cookies should have a light golden color.
You may completely omit the flour if you so choose.

Pignoli Cookies

1 (8 oz) Can Almond Paste
1/2 Cup Granulated Sugar
1/2 Cup Powdered Sugar
1/4 Cup All-purpose Flour
2 to 3 Medium Egg Whites, Lightly Beaten
8 Ounces Pine Nuts
Extra Powdered Sugar To Finish

Preheat oven to 300 degrees F. Prepare two baking sheets with parchment paper, or use silicone linings. Place the pine nuts in a bowl.In a food processor, break up the almond paste into small pieces, and pulse with the two sugars and the flour. Once the mixture is finely ground, begin to add the egg whites a little at a time, just until the dough comes together. Depending on the humidity or the size of your egg whites, sometimes you may need all of the egg whites, while other times you won’t.Using a spoon and slightly wet hands, scoop a small spoonful of the dough, and place this into the bowl of pignoli. Roll the cookie around until it is lightly coated, and then place it on the prepared baking sheet. Continue forming the cookies in this manner, placing them 2 inches apart on the baking pan. Bake the cookies 20 to 25 minutes, and then cool. Dust lightly with powdered sugar before serving.

Thursday, March 1, 2007

Egg Creams, no eggs and thats no yolk !

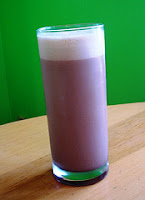
It isn't made with eggs, or cream it is actually a mixture of milk, syrup and seltzer water. If done properly the mixture is very creamy and frothy. The stories vary on how egg creams actually came to be but a lot of people are glad that they did. Egg Creams were something you always associated with New York City. I believe they originated in Manhattan. Over the years soda fountains started to dwindle along with those wonderful soda jerks who would whip up those egg cream masterpieces. Little by little soda fountains and egg creams are making a come back.
But if they are hard to find in your area, I found a place that makes a bottled version that might just ease your egg cream craving until a soda fountain comes to town.

EGG CREAM AMERICA, INC. - MANUFACTURER OF JEFF'S SODAS
In 1990's the founders of Egg Cream America developed their initial corporate mission - in simpler terms, to put the delicious fountain egg cream in a bottle for mass consumption.