Welcome

I am constantly amazed at how animated and talkative people get when you mention food. The mere aroma of certain foods can evoke memories that transport us back to a special place and time. Food can bridge the gap between all ages, races and ethnicities.
Let's face it, the only thing that should ever come between people is a table and some serving bowls.

Sunday, December 27, 2009

O' Rosemary Tree , O' Rosemary Tree


It is hard to believe that rosemary is actually a member of the mint family as it tends to look and taste like it is more closely related to a pine tree. As insulting as that may have sounded, I actually enjoy rosemary on certain foods, three to be exact; chicken, potatoes and lamb other than that I tend to be a bit of a rosemary snob. I remember I had given my mother a rosemary Christmas tree during her time in the nursing home. The tree was about 2 feet tall and very full and fragrant. My mother kept telling me that I should take the tree when the holidays are over and dry it so I would have plenty of rosemary for all my recipes. I laughed; I said Mom if your tree was made out of basil and parsley I would take you up on that offer but being that the tree is made of rosemary it would take me the rest of my life to use it all. So the rosemary tree stayed in her room, we took very good care of it and it joyfully saw her through two holiday seasons.

Roasted Rosemary New Potatoes

3 lbs. sm. red skinned new potatoes
3/4 c. butter
1/2 c. lemon juice
1 1/2 tsp. lemon zest, grated
2 tsp. rosemary
Salt and pepper to taste

Preheat oven to 375 degrees. Quarter potatoes and arrange in baking dish in single layer. Salt and pepper the potatoes, combine butter, lemon juice and lemon zest in a saucepan and heat until butter is melted.

Pour mixture over potatoes. Sprinkle rosemary over potatoes. Bake until lightly browned for 30 to 45 minutes.

Monday, December 21, 2009

Cardboard Never Tasted So Good!


Baccala` is Italian for salt cod which is usually one of the traditional fishes used during the Feast of the seven fishes. Baccala` actually looks and feels like cardboard in its dried state. It is interesting the difference in flavor going from fresh cod which is very mild to the salted preserved cod which when soaked and reconstituted has a much more intense flavor. Due to Baccala's more intense flavor it can stand up well to much bolder flavors such as; olives, capers, lemons and tomatoes more so than its milder counterparts without losing its own unique qualities. Baccala` tends to be an acquired taste, it is not for everyone but for those of us that do enjoy it, it truly makes for a much anticipated holiday treat!

Baccala` With Tomatoes and Olives

2 to 3 lbs. Baccala` (fish), totally submerge in fresh cold water for 3 days, changing water morning and night
1/4 c. oil
2 cans whole tomatoes, chopped or you can use stewed tomatoes
6 med. onions, chopped
3 stalks celery, chopped
2 tsp. oregano
2 tsp. parsley
2 tsp. sweet basil
1 can pitted black olives, small or cut the large ones in half
1 small jar of pimento stuffed green olives
1 tablespoon of capers
Cut up Baccala` into good size chunks or strips
Juice of half a lemon; sprinkle on at the end of cooking to brighten the flavors.

FYI- Salt has been omitted intentionally due to the saltiness of the Baccala` even after soaking. Taste at the end of cooking and only add salt if necessary.

Lightly sauté the onions, garlic, and celery in oil then add the tomatoes and herbs to mixture. Let simmer for 20 minutes. Add Baccala` and cook another 20 minutes, then add olives and capers sprinkle with lemon juice serve and enjoy!

Friday, December 18, 2009

Share The Sweets

It's that time of year when the candy and cookie making bug hits. I know every year I have these great delusions of all the varieties of candies and cookies that I am going to make to share with family and friends. I would love to actually do that and there have been times that I actually have but extra time is a rare commodity these days and so are the extra dollars to spend on the rising cost of ingredients.
That is why I am always happy to find recipes that don't take a lot of time and give you a great deal for very little money. It's nice to know that we can still have the pleasure of making and sharing homemade goodies with our family and friends. It is recipes like these that always seem to make the holidays that much sweeter!


Easy Butter Cream Candy

1 pkg. (3 oz.) cream cheese, softened
1/2 c. butter, softened
4 c. confectioners' sugar
1 1/2 tsp. vanilla
12 oz. chocolate chips, for coating candy

Beat cream cheese and butter in bowl until smooth. Blend in sugar and vanilla. Chill 1 hour - shape into 1 inch balls and chill overnight.

Melt chocolate in a double boiler or use your microwave and dip each ball using fork or toothpick. Dip each ball in chocolate until completely coated. Place on wax paper, parchment or silicone sheets to set.

Place candy in an airtight container and keep refrigerated.

Monday, December 14, 2009

Farfelletti Dolce

I can almost get by merely writing; "Fried Cookies", what more does anyone really need to know beyond that. Fried cookies pretty much tells us that these are delicious, addictive and yes got to have them right now! I grew up with these during the holidays even on my mother's side of the family they did a Polish version called;" Krusciki or Chrusciki they always were divided on the spelling so I am not sure which is actually correct.
The best way to describe these cookies to all of you would be those fried waffles that you would find at an amusement park or carnival. These cookies are crispy, a little greasy (in a good way) and pleasantly sweet without going overboard.

Italian Fried Cookies

6 eggs
3 tbsp. granulated sugar
3 c. flour
1/2 tsp. orange extract
Frying oil
1 tsp. almond extract
1/2 c. confectioners sugar
1/4 tsp. salt
2 tbsp. butter, softened

Cut the butter into the flour as though you were making pie pastry or biscuits. In a separate medium-size bowl, beat together the eggs, sugar, extracts, and salt. Combine all and knead until you have a smooth ball. If the dough is too sticky, gradually add in a little flour.

Divide the dough into 4 or 5 sections and work with a small bit at a time, leaving the remainder covered. Roll each piece out on a lightly floured board to 1/4 inch thickness. Cut with a wavy edged pastry cutter into 6 inch by 1 inch strips. Tie each one into a bow shaped loose knot.

Deep-fry bows until lightly golden brown, drain on paper towels. Sprinkle well with confectioner's sugar.

Saturday, December 5, 2009

Wasting Away Again In Bourbonville....


Searching for my lost shaker of salt....okay we really don't need a shaker of salt in Bourbonville but hey if it was good for Jimmy Buffet. I am not a huge margarita girl, don't get me wrong I am not opposed to drinking them and will rarely turn one down but my true love is bourbon. Bourbon is the nectar that warms this girl's heart and everything else for that matter after she has had a few. I usually drink mine as a double shot gently caressed by one little cube of ice but on some occasions I like to pour two generous shots of bourbon in a big tall glass and top it with Guinness aaahhhhhhhhhh, now that makes me happy.
Here is a nice gentle way to give bourbon a try that is actually quite good. Over time just keep lessening the club soda and before you know it you will be living in Bourbonville all happy and smiling, all happy and smiling, all happy and smiling...oops sorry, I guess one should never type while visiting Bourbonville.

Bourbonville

Ingredients:

• 1 1/2 oz. Bourbon
• 1 1/2 tsp. lime juice
• Club Soda

Mixing instructions:

Combine ingredients, except soda, in shaker with ice, shake and strain into glass. Add soda. Options, twist of lime.

Monday, November 30, 2009

Basking In The Bisque


A tried and true companion to a grilled cheese sandwich has got to be a nice hot steamy bowl of tomato bisque soup. My mother would sometimes take the grilled cheese sandwich, cut it into cubes and scatter them upon the soup to be scooped up one comforting spoonful at a time. No need to do it this way, you may also just dunk your sandwich into the soup or go with the method of alternating bites of sandwich with spoonfuls of the soup. Whatever your individual plan of attack may be you will feel warm and content in the doing.

Tomato Bisque

4 tbsp. butter
2 (28 oz.) cans crushed tomatoes
1/4 cup of red wine or sherry, optional
3 tsp. salt
1/4 tsp. fresh ground pepper
1 c. half and half or to your preference
1 c. heavy cream or to your preference
(Using less of the half and half and heavy cream will give the soup a stronger tomato flavor and richer color).

Melt butter then add onion, sauté onions covered for about 10 minutes. Add tomato, salt and pepper.
Simmer for one hour then add the half and half and the cream, leave on heat for five more minutes then serve.


Monday, November 23, 2009

Stuffing My Face


                                                                                                 Photo/Rak/Flickr

For me the absolute best part of Thanksgiving dinner is hands down the stuffing. If that is all that is served for dinner I will be just fine....well, I will require just a little bit of gravy to pour over the top. We all have our holiday favorites, for me it just happens to be the stuffing and a close second would be the crispy skin of the turkey.
You can actually be quite creative with stuffing just by changing the types of bread that you use. I was watching Rachel Ray the other night and she made her stuffing using store bought pumpkin muffins and then just changed up the spices a bit.
If you think about it we have also been enjoying stuffing as a dessert for years; "Bread Pudding"! Bread pudding is really just the sweet rather than savory version of stuffing.
All I know is any way you slice it, cube it, season it, moisten it "Ima gonna stuffa my face with it"!

FYI- People often ask what the difference is between stuffing and dressing, they are technically both the same. The term stuffing came about because we use to actually stuff the stuffing into the cavity of the bird to bake (before it became so dangerous) and it was always referred to as dressing when it was being cooked in a separate pan outside of the bird. Just call it whatever it is you are accustomed to calling it you will not be breaking any culinary laws.

Apple Sausage Stuffing

1 lb. mild sausage (roll not links or patties)
1/2 lb. hot sausage roll
2 lg. onions, chopped
9 sm. stalk celery, chopped
1 1/2 pkg. cubes for stuffing
3 eggs, beaten
4 lg. red apples with skin, chopped
Apple cider

Mix everything together. Add enough apple cider to dampen the stuffing. Stuff as usual. This is enough for an 18-20 pound bird.

Old Fashioned Corn Bread Dressing

2 (8 in.) pans cornbread, already made
1 lg. pkgs. Pepperidge Farm bread stuffing
2 to 3 cans Swanson chicken broth
1 tbsp. sage
1 tbsp. parsley flakes
2 cans cream of chicken soup
1 stick of butter, melted
2 eggs
Chopped celery
Chopped onions

Mix cornbread with bread stuffing. Add plenty of chopped celery and onions. Add eggs, butter and all seasonings. Add cans of soup. Add enough chicken broth to make mixture almost runny. Pour into large baking pan that has been greased. Bake at 350 degrees for 1 to 1 1/2 hours. Cover with aluminum foil at first. Take off and brown for last 15 minutes.

Oyster Stuffing

3/4 c. chopped onion
1 1/2 c. chopped celery
2 tbsp. butter/butter
9 c. dry bread cubes or Pepperidge Farms
1 tsp. salt
1 1/2 tsp. crushed sage leaves
1 tsp. thyme leaves
1/2 tsp. pepper
1/4 c. chopped parsley
2 (8 oz.) cans standard oysters, chopped
2 eggs
1 3/4 c. oyster liquid and milk

In large pan, melt butter. Cook and stir onion and celery until tender but not brown. Add bread cubes, seasonings and mix. Stir in chopped oysters. Beat eggs into oyster liquid and milk. Add liquid gradually and toss lightly to evenly coat.


Tuesday, November 17, 2009

Delicious Dilemma!


Even though its name implies dessert, this dish serves equally well as a side for your Thanksgiving fare. It is actually far less sweet than the traditional sweet potato casserole with marshmallows that we all are so familiar with. To a small degree it is slightly reminiscent texturally of a very moist stuffing due to the cake mix.

You just have to decide; dessert or side dish...I cannot think of a more delicious dilemma!

Sweet Potato Cobbler

1 box Betty Crocker yellow cake mix (any brand will do)
1 stick butter
Cinnamon
Water
1/2 c. sugar, brown sugar tastes best
1 lg. can sweet potatoes or yams or 3 small cans (you want about 27 to 29 ounces all together.
3/4 c. pecans, chopped or whole (opt.)

Place sweet potatoes, cut in large chunks on bottom of 10"x13"x2" pan. (Save juice in can.) Sprinkle most of sugar on top of potatoes. Sprinkle dry cake mix on top, cut stick of butter in chunks and place on top of cake mix. Sprinkle cinnamon to taste on top of cake mix. Sprinkle sugar to sweeten cinnamon. Add finely chopped pecans on top of cake mix.

Fill can potatoes came in with water and left over juice until can is 3/4 full (you want no more than 20 ounces of liquid roughly 2-1/4 cups. Pour over cake mix. Bake 25 to 30 minutes at 350 degrees or until top is light brown.

Thursday, November 5, 2009

Batter Up!


I often crave a good fish fry and I especially love mine done in a really good beer batter but I think I have found something that actually works better. While on one of my recipe hunts I came across a batter for fish that uses a can of 7-Up. The more I thought about it I realized this was a great idea even more so than using beer. The carbonation has always been a key component in getting that light puffiness that you look for in a good beer batter but what the beer does not give you is.....sugar and lots of it. That is where the 7-Up fits the bill brilliantly. It has enough carbonation to ensure that it puffs up but it also has a very high sugar content to create a caramelized crispiness that you don't quite achieve using the beer. Plus the lemon lime flavoring actually imparts an interesting flavor dimension to take your normal fish fry to a whole new level.

7-Up Fish Batter

1 egg
1 c. pancake mix
8 oz. 7-Up (approximately)
additional pancake mix
Fish filets of your choosing, also works well with shrimp, scallops or clams.

Mix egg, pancake mix and 7-Up together well. Dip thin fish fillets, which have been coated with pancake batter (shake both in plastic bag) and chilled about 20 minutes in mixture. Remove 1 at a time and deep fry for 4 to 6 minutes at about 400 degrees. Remove onto paper towels to drain.

Saturday, October 31, 2009

It's Crunch Time


Between Halloween and Christmas there was always a tremendous amount of candy making taking place among our family. Each family member seemed to have that one particular candy that was theirs and theirs alone. Aunt Mimi was famous for her chocolate covered almonds, Aunt Elsie, it was her honey fudge and for Aunt Jay it was always her peanut brittle. There was only one candy that it seemed everybody made, my Mother and Grandmother included and that was chocolate haystacks. You know the ones with the Chinese noodles stirred into melted chocolate then mounded by spoonfuls onto wax paper to look like little haystacks. We all loved those mainly for the texture more than anything else because the noodles remained crisp. Well here is the exact same recipe but instead of the Chinese noodles this one uses Grape-Nuts cereal. These give the candy a tremendous crunch which goes quite nicely with the smooth creamy chocolate.

Grape-Nuts Chocolate Drops

2 pkg. semi-sweet chocolate chips
1 (14 or 15 oz.) can sweetened condensed milk
1 c. Grape-Nuts
1 tsp. vanilla

Melt chocolate over boiling water, remove from heat. Stir until smooth; add milk and blend some more. Now add your Grape-Nuts and vanilla, drop from teaspoons onto waxed paper, cool until firm.

Yield: 5 dozen candies.

Monday, October 26, 2009

Hug A Ghost Today......If You Can


I am certainly no expert on ghosts unless of course you are referring to Casper the friendly ghost, the friendliest ghost I know. Casper is so darn friendly I am sure the rest of you all know him as well! As friendly as he is though, you just can't reach out and touch him. It's like trying to hug air or nail Jell-O to a tree, it just can't be done. If you go by the ghosts you see on TV or read about in books it really seems like the majority of the ghost population is pretty much untouchable. As humans it is said that lack of touch tends to shorten ones life but apparently in the case of ghosts, lack of touch has no effect on that; "Roam the earth for all eternity thing"! Sad really, I am sure that they would like to shorten the amount of time spent in all eternity......oh well! As a sign of compassion for all those untouchable ghosts out there I will create this post in their honor.
It sure takes a heck of a lot of balls to roam the earth for all eternity without ever getting a handshake or a hug or any kind of touch at all.

Ghost Balls

1 can of sweetened condensed milk
1 lg. box of Rice Krispies
1-1/2 bags of the large marshmallows
1 cup of butter (2 sticks)
60 Kraft caramels

 Melt butter and caramels with milk in a double boiler or on low heat in a sauce pan. When completely melted, dip marshmallows one at a time in caramel mixture then roll into Rice Krispies.

FYI- Those thin pretzel sticks are great to use for dipping your marshmallows and make a nice salty handle to compliment all that sticky sweet goodness.

 Place on waxed paper to cool, keep in air tight container.

Thursday, October 22, 2009

My Piece Of The Pie


photo/rwithtweezers/flickr

For some of us getting caught up in tradition overrides our senses, we may not necessarily like something but we do it for the sake of tradition. In my case this holds true for the seemingly mandatory dessert of pumpkin pie for thanksgiving. It's not that I hate pumpkin pie...well I have had a few that deserved to be hated! For the most part when it comes to pumpkin pie I can take it or leave it. I usually end up taking a small slice after our dinner because I get caught up in everyone's excitement and the fact that somehow thanksgiving becomes incomplete without it.
I am also the same gal that when they ask if I would prefer white meat or dark meat my answer is neither. Just give me the crispy turkey skin and a boat load of stuffing and I am quite happy and beyond thankful
I probably should be putting this post in closer to thanksgiving but all the Halloween pumpkins everywhere have been reminding me of the pumpkin pies that are looming in my not too distant future.....as a form of rebellion, I will not be posting a recipe for pumpkin pie!

Chocolate Chip Pumpkin Bread

1- 2/3 c. flour
1 tbsp. pumpkin spice
1 tsp. baking soda
3/4 tsp. salt
1/4 tsp. baking powder
1 1/2 c. sugar
1/2 c. vegetable oil
2 lg. eggs
1 c. canned plain pumpkin
1 c. semi-sweet chocolate chips

Butter 9 x 5 x 3 inch loaf pan.

Bake at 350 degrees for 1 hour 10 minutes.

Mix flour, spice, baking soda, salt, and baking powder. Beat sugar, oil, and eggs in large bowl. When well blended, beat in pumpkin and 1/3 cup water. Stir in flour mixture, then chocolate chips. pour batter into prepared pan, bake then cool in pan 15 minutes and then turn out onto wire rack.

Sunday, October 18, 2009

Wake Up and Be Happy

These are like a beautiful dream that you never want to wake up from. Light fluffy layers of chocolate pancakes like gentle clouds glistening with the gentle dew of vanilla syrup cascading through the rivers of melted butter.........Hey! Wake Up! Sure it's a nice dream but why dream about them when you can actually be making them and eating them.

Chocolate Pancakes

2 cups flour
3 teaspoons baking powder
1/2 teaspoon salt
3/4 cup sugar
1 cup milk
4 teaspoon butter, melted
2 eggs
4-6 teaspoons cocoa
Chocolate chips, optional

Combine dry ingredients. Add remaining ingredients and stir only until mixed.

Preheat a non-stick skillet until very hot, brush lightly with butter. Pour pancake batter onto hot skillet; flip when bubbles begin to form along edges. When lightly browned on both sides, remove pancakes and stack with pats of butter between each one.
Keep warm in oven until ready to serve.
Try serving these with this delicious vanilla syrup or any of your own favorite pancake toppings.

Vanilla Syrup:

1/2 cup butter, melted
1 1/2 cups powdered sugar
1 teaspoon vanilla

Mix together until smooth

Tuesday, October 13, 2009

Sip With Caution

Going to the portside of my previous sherry post I wanted a recipe other than one using meat. I have just always used port wine in primarily meat dishes either as a marinade or a sauce accompaniment and I wanted a totally different medium for the bold, sweet, spicy spirit. Well I sure think that I hit a bulls eye with this find....come on, its cheesecake how bad could it be? I will confess right from the beginning that I have not made this yet, so I cannot honestly tell you if it tastes good........come on, its cheese cake and its a cheesecake that contains port wine of course it's good!
This recipe only uses a third of a cup of port wine, so there will be plenty left in the bottle to sip while waiting for your cheesecake to be done. Try not to get carried away with the sipping or my next post will be titled; "Human Marinated in Port Wine".......we wouldn't want to start exciting the cannibal population!

Port Wine Cheesecake

Crust:

1 1/2 c. graham cracker crumbs
1/2 c. chopped walnuts
1 tsp. cinnamon
3 tsp. sugar
1/2 c. melted butter

1) Mix crumbs, nuts, cinnamon and sugar with melted butter. Place and press into a 9x13 baking sheet and bake in a 350 degree oven for 15 minutes.

Cheesecake Mixture:

2 lbs. softened cream cheese
6 eggs
1/2 c. sugar
1/3 c. Port wine
1 tsp. vanilla

2) In large bowl, beat all ingredients until smooth; make sure there are no lumps. Pour over crust and bake at 350 degrees for 20-25 minutes. Remove and let cool for 15 minutes.

Topping:

1 1/2 c. sour cream
1/2 c. sugar
2 tsp. vanilla

3) In a bowl mix together sour cream, sugar and vanilla and pour over cool cheese cake. Bake at 350 degrees for 15-20 minutes. Let cool completely. Decorate with walnut halves and strawberries and serve.

Thursday, October 8, 2009

Life Is Just A Bowl Of Sherry


My mother's two favorite spirits were port wine and cream sherry as well as dry sherry. I use to always get her a bottle of each during the holidays, it was always a pleasure to watch her savor every little sip.
During dinner the other night my dear friend and neighbor, Christine started talking about recipes containing port or sherry. I was telling her that I always use sherry when I make lobster bisque and that port is used a lot in meat preparations. Well now I find myself very focused on finding unique ways to use the two spirits. This recipe could not be more perfect for us it uses one of our most favorite cheeses, brie and a heavy dose of cream sherry, which I am sure would have made my mother quite happy. Now we will just have to find some wonderful recipe to make using port.

Sherried Brie Soup

2 c. cream sherry
2 tbsp. butter
6 c. sliced mushrooms
2/3 c. minced shallots
2 tsp. fresh lemon juice
2 tbsp. flour
4 c. beef stock
4 oz. trimmed brie
2 c. heavy cream
1/2 tsp. pepper
1-2 tsp. salt
 cube up some brie and mince some chives for garnish

In a saucepan, reduce cream sherry by half. Melt butter in another medium saucepan. Stir in mushrooms, shallots and lemon juice. Cook over medium-high heat, stirring 2 minutes. Remove from heat and stir in flour until well blended. Return to heat and add beef stock and reduced sherry. Bring to boil then reduce to a simmer about 25 minutes. Add trimmed Brie; stir to melt. Add heavy cream, pepper and salt. Ladle hot soup into serving bowls. Garnish with additional brie and minced chives.

Sunday, October 4, 2009

Squashing My Sanity


This is probably one of those stories that unless you were actually there you just can't truly appreciate it......but then again, the only real criteria needed to understand this is to be part of a family.

I was at my grandmother's apartment a few weeks back and all I did was mention how much I liked butternut squash. I had said I do not mind acorn squash but it isn't at the top of my list. That was it, nothing more was said and we went on to other topics of conversation. Well for whatever reason me getting my butternut squash became a mission for my grandmother. It is too expensive in the stores she said, you need to get them at the farmers markets and get a lot because they last for months if kept in a cold dark place. I said I hadn't been going to the farmers markets as much as I use to I just haven't had the time. Well I will see if your father will take me and we will get your butternut squash so you don't have to pay those ridiculous prices. For a couple weeks all our conversations were pretty much based on this butternut squash that I merely mentioned in passing, my grandmother was obsessed with it. Finally last Saturday my father took her to the farmers market, when she got home she called to tell me that she found my butternut squash but your father would not let me pay for it...he said; that is my daughter and I will buy her the butternut squash.
Well yesterday, I went over to my grandmother's for a visit and of course to pick up my butternut squash. When I got there, two bags were sitting on the floor. Go look in the bags, my grandmother tells me. Look at how beautiful your butternut squash is....that your father wouldn't let me pay for that he insisted on buying for you...just look at how beautiful they are!
They are beautiful Meema, thank you so much for all these "Acorn Squash", I'll be sure to call Dad and thank him as well.
Yes, of course I am grateful! Come on, we've all been here at one time or another...it's just funny, funny family stuff.

Acorn Squash with Apple Raisin Stuffing

1 acorn squash, med. Size (just keep doubling amounts if using more than one squash)
2 tbsp. butter
1/4 c. scallions, chopped
1/2 apple, peeled, cored and cubed (1/2 c.)
1/3 c. raisins
2 tbsp. toasted walnuts, chopped
2 tbsp. maple syrup, or to taste
1/8 tsp. ground cinnamon
Salt and pepper to taste

Preheat the oven to 350 degrees.

Cut the squash in half lengthwise and scoop out the seeds and strings. Cut a slice off the bottom, if necessary, to make the halves stable. Melt the butter in a sauce pan and brush a little over the cut surface. Put the squash cut side down on a pan, add a little water to cover the bottom of the pan and bake for 30 to 35 minutes, until tender.
Meanwhile, heat the remaining butter in the pan and sauté the scallions for about 3 minutes, stirring, until softened. Add the apple and cook about 3 minutes more, stirring. Add the raisins, walnuts and maple syrup. Cover and cook about 5 minutes. Season the mixture to taste with cinnamon, salt and pepper. Spoon the stuffing into the squash cavities and bake 15 to 20 minutes more, adding more water to the pan if necessary.

Tuesday, September 29, 2009

Gone But Not Forgotten....Happy Birthday Mom


         "To live in the hearts we leave behind is not to die." ~ Thomas Campbell


                                                           Are there birthdays in Heaven?
Does the Angel blow his horn
announcing to everybody
this is the day that you were born?

Can the stars be your balloons?
or an angel food your cake?
Presents wrapped in moonbeams
that the Angels helped to make?


Your birthdays have meant so much to us;
they were always a very big deal.
Birthday presents, your favorite treats,
and perhaps a special meal.


So we'll whisper a little prayer today
asking everyone here and  above
to sing you a Happy Birthday song
and with it all our love.


I wasn't sure what recipe to post in honor of my Mother's Birthday she loved to eat and had a great many favorites. Then it dawned on me the one food item that was always on the top of her list was......onions! Without exaggeration I can honestly say that my mother went through at least five pounds of onions a week if not more.

I'd like to say that I am about to wow you here with some fancy schmancy recipe using onions but my mother was a purist and enjoyed them in their simpler form......sliced thick between two slices of bread.......it's enough to make you cry!

Happy Birthday Mom, you are greatly missed, fondly remembered, spoke of often, your Harriet-izms still fill us with laughter and bring smiles to our faces...we thank you for the joy that you have given us and still give us.

Harriet's Favorite Sandwich

1 Onion (red, white, Vidalia, Spanish...it just needs to be an onion).
2 slices of bread (she didn't care; it could have been wonder bread or rye)!
1 Tablespoon of either miracle whip or mayonnaise
Salt and pepper to taste.

Spread the mayonnaise/miracle whip on one or both slices of bread. Cut onion into 1/2 inch to 1 inch slice, place slice on bread add salt and pepper, cover with remaining slice of bread and enjoy.

Saturday, September 26, 2009

No Knead To Thank Me!


photo/andinou/flickr


There is nothing like the taste and smell of homemade bread fresh from the oven. Hopefully if you were fortunate enough you either had a mother, grandmother or aunt kneading away in the kitchen at that silky aromatic yeasty dough. I do not wish to short change the men here since they are excellent cooks and bakers as well...or you had a father, grandfather or uncle kneading away in the kitchen at that silky aromatic yeasty dough.

Anyhow if you did grow up in a "A daily homemade bread kind of house" you know how special homemade bread can be and how important the people who make this bread are. It takes a lot of muscle to make bread and what happens when the bread bakers we love and adore no longer are able to knead the dough? Maybe its arthritis, tendinitis or it's just that they don't have the strength they use to but still want the pleasure of providing homemade bread for their loved ones.
Sure we can all get off our behinds and get in the kitchen to help but with these recipes there is just no knead to.....they can do it all by themselves! Now pass the butter while the bread is still warm I am starving.

Home Baked No Knead Bread

1 1/4 c. warm water
1 pkg. active dry yeast
2 tbsp. soft shortening
2 tsp. salt
2 tbsp. sugar
3 c. sifted flour

Pour warm water into large mixing bowl. Sprinkle yeast over water, stir until dissolved. Add shortening, salt, sugar and 1 1/2 cups flour. Beat 2 minutes at medium speed of electric mixer. Scrape sides and bottom of bowl often. Stir in remaining flour and beat with a spoon until smooth, 1 1/2 minutes. Scrape batter from sides of bowl. Cover dough with clean cloth and let rise in a warm place, free from draft until doubled in bulk, about 30 minutes. When batter has risen, stir down by beating about 25 strokes. Spread batter in a greased loaf pan (9"x5"x3"). Batter will be sticky. Let rise in warm place until batter reaches 1/4" from top of pan, about 40 minutes. Bake in oven at 375 degrees for 45 to 50 minutes until golden brown. When done, brush top with butter while still hot.

No Knead French Bread

1 pkg. dry yeast
1 1/2 c. warm water
1 tbsp. sugar
1 1/2 tsp. salt
1 tbsp. soft shortening
4 c. sifted all purpose flour

Measure flour into bowl, add water, then yeast. Let yeast dissolve thoroughly. Add remaining ingredients and mix well. Let set 10 minutes, then cut through dough with a wooden spoon. Do this 5 times at 10 minute intervals. Turn dough out on floured board and divide in half. Let rest for 10 minutes, then roll each ball into a loaf. Make several diagonal slashes across each loaf. Let rise double. Bake at 400 degrees for 30 minutes.

No Knead Raisin Bread

1 1/3 c. hot water
1 c. sugar
1 tbsp. salt
1/2 c. butter, softened
1 c. warm water
4 pkg. active dry yeast
2 eggs, slightly beaten
6 1/2 c. flour
2 c. seedless raisins

GLAZE:

1 c. powdered sugar
1 tbsp. milk
1/4 tsp. vanilla

Mix hot water, sugar, salt and butter; cool until lukewarm. In large bowl, dissolve yeast in warm water. Add first water mixture to eggs, flour and raisins. Beat until well-blended, about 2 minutes. Cover, let rise in warm place until more than doubled, about 50 minutes. Punch batter down and beat vigorously be hand, about 75 strokes. Turn into two greased 9 x 5 inch loaf pans or two (1 1/2 quart) casserole and bake at 400 degrees for 45 minutes or until golden. Remove from pan immediately. Beat glaze ingredients until smooth and shiny. Pour icing over bread when cool, letting it drip down the sides.

Sunday, September 20, 2009

Uncommonly Good

I can guarantee you that a recipe will always catch my eye when it makes use of an ingredient in an uncommon way. I have enjoyed split peas most of my life mainly due to the fact that my mother's favorite soup was split pea with ham. My mother made an enormous pot of that every month which meant we ate it a couple of times a week. Other than soup I have never made or seen split peas used in any other manner until now. I just think these are down right clever it makes you wonder if it will catch on the way that putting zucchini in bread did!


Split Pea Bars

2/3 c. dry split peas                                                                                                  photo/Rigib's/flickr
2 c. water
1 c. skim milk                                                                          
1/4 c. oil                                                                             
2 eggs (or 1/2 c. egg substitute)
2 1/2 c. flour
1 c. chocolate chips (opt.)
1 tsp. baking soda
1 tsp. baking powder
1 tsp. cinnamon
3/4 c. sugar
1 c. raisins
1/2 c. chopped nuts
1 tsp. nutmeg

Combine split peas and water; cook about 1 hour over low heat to make a thick soup. (You may need to add a little more water to keep it from getting too thick to stir.)

Combine thick soup and milk. Combine oil, sugar and eggs. Beat well. Sift two cups in flour with other dry ingredients. Add sifted ingredients alternately with liquid, beating well. Dredge raisins and nuts (and chocolate chips, if used) in the remaining 1/2 cup flour and stir into batter. Spread into greased jelly roll pan and bake at 350 degrees for 25 to 30 minutes. Cut while still warm.


Sunday, September 13, 2009

Hats Off To A Special Lady

photo/zutronic/flickr


A discussion about women, who could pull off wearing big hats and look stunning, got me to thinking about my Aunt Lena. My Aunt Lena was a full figured blond haired blue eyed Italian girl. In those days it seemed that all the ladies had really big hair, my Aunt was no exception. That head of hair was all hers unlike my grandmother who always wore a wiglet to give her that Marge Simpson effect. I was always fascinated by the importance of hats back then; they were almost a form of societal status. Just as important were the gorgeous boxes that contained those beautiful head toppers. Somewhere along the line we lost the genetic ability to be able to pull off wearing such artistry on our heads without looking ridiculous. Definitely an era that has come and gone, hopefully it will return someday, for that seemed to be such a glorious time.
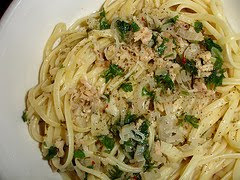
There was another thing that my Aunt Lena was famous for and that was her linguini with red clam sauce. It was always her special holiday dish and if we were lucky a special addition to our weekly Sunday dinner. I have always preferred the white clam sauce but Aunt Lena's red clam sauce was always the exception, one of the best that I have ever had to this day.

Aunt Lena's Red Clam Sauce

2 c. chopped onions
1 lg. green pepper, chopped
8 cloves garlic, minced
12 oz. mushrooms, sliced
2 tbsp. olive oil
2 tbsp. water
4 (6 1/2 oz.) cans chopped clams, with liquid
1 (61/2 oz.) can of minced clams, with liquid
1 tsp. dried basil
1/4 tsp. crushed hot red pepper
1/4 tsp. ground black pepper
1 (15 oz.) can tomato sauce
1 (6 oz.) can tomato paste

In 4 quart covered saucepan, sauté onions, green pepper, garlic and mushrooms in olive oil and water over medium low heat until onions are translucent. Add remaining ingredients and simmer, covered, over low heat for 45 minutes.

Serve over pasta.


photo/maomau/flickr

Julie's White Clam Sauce

1/4 cup pure olive oil
4 cloves garlic
Small white onion, chopped
1/4 stick of butter
1 1/2 cup clam juice
1/4 cup chopped parsley
1/4 cup of oregano
salt and fresh ground black pepper to taste
5 -6.5 ounce cans of chopped clams with liquid
1 doz. fresh clams, optional as an added tasty garnish

In frying pan sauté garlic and onion in oil for one minute over moderate heat, add 1/4 stick of butter, add clam juice and bring to boil. Add parsley, oregano, salt, pepper, clams and let simmer for 15 to 20 minutes.

Serve over pasta

Thursday, September 10, 2009

Gourd Ole`


Italians have always loved using butternut squash in less conventional ways than most. In many good Italian restaurants you will usually find on the menu; butternut squash ravioli with butter and sage an absolutely classic, comforting dish. I have also noticed more and more upscale restaurants are offering butternut squash pizzas and focaccias', which I look very forward to trying. I am sure the natural sweetness of the squash mingling with a nice gorgonzola or other sharp tangy cheese is quite an inviting combination on a crisp hot from the fire crust.
When I spotted this recipe giving butternut squash a Mexican twist, I knew it was a must try and I was right it is unbelievably good.

Butternut Squash in the Style of Refried Beans

1 med. butternut squash
1 1/2 tsp. chili powder
1 1/2 tsp. ground cumin
1 1/2 tsp. oregano
2 cloves garlic, crushed
3 tbsp. corn oil
1 tbsp. bacon fat
6 corn tortillas or 4 flour tortillas
2 c. shredded cheese (Cheddar or Jack)
1 c. shredded iceberg lettuce

Quarter the squash and steam until tender. Heat the tortillas in a little corn oil until crisp. Peel squash. Heat oil and fat in large skillet, add squash and mash and stir while adding chili powder, cumin, oregano and garlic. Keep stirring and mashing until fairly dry.
Spread on tortillas. Sprinkle with cheese. Broil until bubbly. Cover with lettuce and dot with salsa. Serve remaining salsa on side.

SALSA CRUDA:
3 peeled tomatoes, diced
1 med. onion, minced
2 cloves garlic, crushed
2 tsp. oregano
2 oz. canned, diced green chilies

Combine and mix well. Let stand to allow flavors to mingle.

photo/sweetjane/flickr

Saturday, September 5, 2009

Fire Up The Senses


In a desperate attempt to triumph over the excruciating boredom that can come from eating a "Garden in the Raw", I had to get creative or fail in my attempt. One of the greatest epiphanies that I have had while on this 21 day raw food journey is; Flame to food is good! By taking away the cooking aspect of what we put in our mouths food lacks one all important component needed to complete the sensory experience....Aroma! Raw foods lacks that symphony of smells, those little beads of flavor that attach themselves to the hot steamy wisps that rise from our food and into our nose, one glorious whiff at a time. If all our senses are not addressed the overall eating experience is far less pleasurable and leaves us unsatisfied. Sure raw foods have their own fresh from the earth scent and yes it is good delicious food but when that is all you are eating......it's like going to the Opera and every performer has laryngitis. Beautiful set, beautiful costumes and when they open their mouths to sing...Nada! I think you get the picture.
This was my attempt in giving the Diva her voice back so to speak and once again regain some of that pleasure that one should joyfully derive from eating.

Raw Vegetable Relish Salad

2 or 3 medium zucchini squash, chopped
2 yellow squash (summer squash), chopped
1 small red onion, chopped
3 cloves of garlic, chopped fine
1 red bell pepper, chopped
4 ears of corn, cut kernels off cob
4 or 5 button or baby Bella mushrooms, chopped
3 or 4 ripe tomatoes, chopped
1 jalapeno pepper, chopped
1 cup of fresh cilantro, chopped
1/2 cup of raw sunflower seeds
The juice of two fresh limes (may also add zest and pulp for added flavor)
1/4 cup of extra virgin olive oil
Salt and Pepper to taste
1 head of celery cabbage (Napa cabbage and romaine leaves also work well) tear off leaves and spoon on relish, it ends up being like a finger salad or a crisp veggie taco. This raw veggie relish is also wonderful in a halved avocado or stuffed inside mushroom caps.

Place all the ingredients in a big container (preferably one with a lid). Mix everything well and let sit in refrigerator for at least three hours or better still overnight. This is one of those dishes that gets better and better the longer it marinates. The flavors are vibrant and so fresh on the palate and yes, it has a wonderful aroma.

Thursday, August 27, 2009

A Copycat With Good Taste!

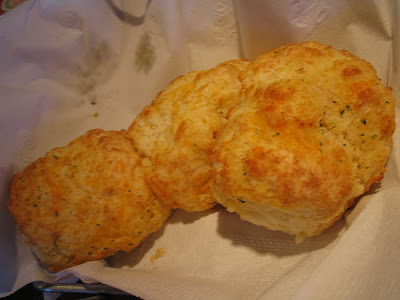
I know a gal who can put away a few baskets of these prior to her meal arriving while dining at the Red Lobster. We have this standing joke that when it comes to having an appetite and being able to pack in the food, that she is the master! I absolutely love watching her eat, she so enjoys her food. I do have to say that the biscuits at the Red Lobster are amazing so I was happy to find a recipe that is pretty darn close in both taste and texture. You definitely do not want to make a batch of these if you are counting calories but every once in awhile you just have to treat yourself to something sinfully delicious.

Biscuits Ala Red Lobster

2 c. Bisquick
2/3 c. milk
1/2 c. grated cheddar cheese
1/2 c. melted butter
1/4 tsp. garlic salt (if you are watching your sodium intake, substitute with garlic powder)
Fresh or dried minced parsley for a light sprinkle, optional

Mix Bisquick, milk and cheddar until a soft ball forms. Beat vigorously for 30 seconds. Drop by balls onto an ungreased baking sheet and bake at 450 degrees for 8 to 10 minutes. Mix butter and garlic and brush on rolls while still on the pan and hot.


photo/Chexiemix/flickr

Thursday, August 20, 2009

The Raw Truth

I am currently on my eighteenth day of a 21 day raw food program. What drew my interest to this was a documentary I saw about a woman in the destructive stages of diabetes. In her desperation to get better she searched the internet and the one thing that kept coming up was the benefits of a raw food diet. During her search she found a place called; "The Tree of Life 21 day program". This program claimed that people had been going off their medications after as little as 4 days. Being both skeptical and hopeful all at the same time she went to her doctor and told him she was going to make the trip and try this program. Needless to say as a doctor he was skeptical but could see no harm in her trying it, besides he was also curious to examine her afterward to witness the results for himself. Well to make a long story short, this woman did the program which consisted of 21 days of nothing but raw unprocessed foods, all plant based and absolutely nothing could be heated above 116 degrees. They used cheese and ice cream that was made from nuts because absolutely no dairy or soy is allowed. There was always more than enough to eat and she really did enjoy the food. By her fourth day she was able to stop her medication and by her nineteenth day she had lost 16 pounds with her only exercise being some light to moderate walking each day. When she came back home her doctor could not believe how good her stats were and told her to continue eating the raw foods and occasionally implement a bit of meat or fish if she wished. Well her whole family rallied around her and years later she is still off all her medications and her and her entire family are leaner and healthier than they have ever been.
Luckily I am not diabetic but it does run heavily in my family. I was more interested in the weight loss aspect of this way of eating and the overall health benefits. So here I am on my 18th day feeling better than ever. I've lost about 10 pounds and my energy level is through the roof, so I am very pleased with the results. I have decided to make raw foods a consistent 75% of my lifestyle and allow 25% of the many foods I love and crave to be eaten periodically throughout.
I would suggest this program to anyone who just wants to feel better, there is no starvation here you can eat an enormous amount of food. Just look into it, I promise you will not be sorry that you did.

Raw Fresh Salsa

3 or 4 lg. tomatoes, peeled and chopped
2 fresh chilies, seeded and chopped
5 green onions, chopped
2 fresh jalapeno peppers, seeded and chopped
1 tsp. ground cumin
1 tsp. fresh lime juice
2 tsp. minced fresh cilantro
1/2 tsp. freshly ground black pepper
1/4 tsp. sea salt

In lidded jar or covered non reacting container, combine all ingredients and marinate for at least 1 hour.

This salsa will keep in the refrigerator up to 3 weeks.

Makes 2 cups.

Photo/DivrChk/Flicker

Friday, August 14, 2009

BananaLicious

My first tasty experience with a frozen banana was many years ago when I was vacationing as a child in Disney World Florida. To give you an idea as to just how long ago that was Epcot Center didn't even exist. While there visiting all the different attractions my aunt and I kept spotting these little carts along the way with a sign that read; frozen bananas on a stick. Well needless to say that perked our curiosity along with the fact that it was 90 degrees and the thought of anything cooling was very inviting. So my aunt and I took the plunge and each got one, they just looked like fun to eat. They were so pretty enrobed in all that chocolate and generous coating of chopped peanuts. The first bite was difficult as they were frozen rock hard. But once we succeeded we were in taste bud heaven. The crackle of the chocolate coating and the crunch of the peanuts were a delightful experience but the true star was that texturally amazing frozen banana. You would swear that we were eating high butter fat banana custard, it was rich and creamy just like ice cream without the drippy mess you would normally get with ice cream on a hot day.
Just recently a local ice cream parlor where we live started carrying frozen bananas dipped in chocolate and coated with various things such as nuts, sprinkles, crushed cookies and the other day they even had some coated with different types of cereal.
Soon the obsession crept in and we were going to purchase these little gems a few times a week until we realized it was taking a ridiculous toll on the pocket book.
That is when we decided that it would probably be easier and a lot less expensive to make these ourselves. It was a delicious decision and now whenever we open our freezer we know that there is something special waiting for us to enjoy.
Just have fun with these, they are so easy to make and keep for weeks in the freezer. The perfect treat for the entire family to make and enjoy together.

Chocolate Dipped Frozen Bananas

6 tbsp. butter
1-1/2 cups of semi sweet chocolate morsels
8 Ripe but not too ripe bananas
8 wooden sticks
Assorted coatings; Nuts, sprinkles, cereal, crushed cookies whatever you like it's completely optional because these taste just as good with the banana and chocolate alone.

Another tasty suggestion: split bananas lengthwise and spread a little peanut butter on flat side then put halves back together. Now you have a whole banana filled with peanut butter ready to dip in chocolate, these are really good!

Melt butter and chocolate together and simmer over low heat stirring until smooth. Pour chocolate mixture into a dish and set aside. Peel bananas; insert stick into end of banana. Immediately dip each banana into melted chocolate and coat evenly, then roll in your choice of coatings pressing gently into chocolate. Place on waxed paper lined tray and freeze until firm, about 2 hours, serve frozen. To store wrap each in aluminum foil and keep in freezer, these will keep for weeks if people can stop eating them long enough!

photo/ae/flickr

Thursday, August 6, 2009

Childhood Favorite All Grown Up

I could not find a picture of the ham and raisin tv dinner to save my soul.....

Talk about something conjuring up a memory. I was surfing the internet and I happened to see this recipe for raisin sauce and I immediately thought; "Swanson's Ham and Raisin Glaze TV Dinner". There were only two TV dinners that I would ever eat, one being the ham and the other was the fried chicken. I could not imagine eating a TV dinner now, they are so expensive. Plus that little bit of food they give you would never satisfy my appetite, I would need at least two of those dinners to call it a meal. I am sure that this recipe I found is much fancier than Swanson's version which was perfectly suited to a child's palate. Let's just say this is my childhood ham and raisin dinner all grown up.... hurry up and pass the ham so I can ladle on the sauce!

Raisin Sauce

2 tablespoons brown sugar
1/2 teaspoon grated orange rind
1 teaspoon dry mustard
1 1/2 tablespoons cornstarch
1 cup orange juice
1/3 cup seedless raisins
1 tablespoon ham drippings or butter
1/2 cup ginger ale

In a small saucepan, combine brown sugar, orange rind, mustard and cornstarch. Stir in orange juice. Bring to a boil, lower heat and continue to simmer until mixture thickens (5-10 minutes). Add raisins and butter or drippings from ham; cook another 3-4 minutes. Stir in ginger ale.

Saturday, August 1, 2009

Grandmothers'... The True Icing On The Cake!

Everyone's a critic when it comes to butter cream frosting it's too gritty, too sweet, too hard, too soft. The fact of the matter is that it's nearly impossible to ruin a butter cream frosting. For almost every possible scenario of what could go wrong there is an easy remedy. If it is too stiff, add milk a little at a time until desired consistency is reached. If the frosting is too soft, add more confectioners' sugar about a quarter cup at a time until its right.
A basic butter cream frosting to the pastry world is not unlike a Béchamel sauce to the savory world; both can take on whatever flavor you choose to give it. It is the white canvas of your imagination and senses to freely and limitlessly create upon.
I grew up preferring my grandmother's butter cream frosting to any of the store or bakery versions that I had tried. As a child I did not appreciate the amount of work that my grandmother put into her baking, I merely reaped the results of her efforts with delight and an insatiable hunger for more. Now that I am older and have that modern day ego that has conditioned me to think that I am somehow more pressed for time than she was in her day was the perfect excuse as to why I found her recipe a bit over the top time wise and went for my slightly quicker version of butter cream frosting. I believe that my version is still as creamy, buttery and delicious as my grandmother's recipe and holds up well on any cake, cupcake or cookie. The only flaw with my recipe was not the ingredients that it had but more so the ingredient that it lacked...... my grandmother. We have so many ingredients at our disposal these days that afford us the ability to prepare any recipe. Only one ingredient remains that can never be bottled, boxed or purchased and that ingredient is the loving heart and hand of a grandmother happily at work in the kitchen preparing her families' favorites as only she can; nothing could ever be sweeter than that.

Grandmother's Version of Butter Cream Frosting

10 tbsp. flour
2 cups of milk
1 cup of Crisco
1 cup of butter
2 tsp. vanilla
2 cups confectioners sugar

Put milk in saucepan over low heat. Add flour, 1 tablespoon at a time. Stir constantly until smooth. Let cool. Meanwhile, mix Crisco, butter, vanilla and sugar. When flour mixture is cooled, beat everything together until smooth.


Granddaughter's version of butter Cream Frosting - my recipe will make less frosting than my grandmother's, just double the amounts if you need more.

1 lb. powdered sugar
1 cup of butter
3 tbsp. milk
1 1/2 tsp. vanilla

Beat half the sugar with the shortening and butter. Gradually add milk. Continue beating, add vanilla and gradually add remaining sugar until the right consistency is reached.

FYI - A good butter cream frosting should taste sweet and buttery without being gritty.
Butter cream frosting can be refrigerated up to a week safely. Just remember to bring it to room temperature before using.

Sunday, July 26, 2009

The Seven Wonders of Soup


There is an old Italian saying that states; La Zuppa fa sette cose which in English translates to Soup does seven things". It is said to; quench your thirst, satisfy your hunger, fill your stomach, aid in your digestion, make your teeth sparkle, color your cheeks, and help you sleep. I cannot honestly say that soup has managed to do all those things for me but I can say, that soup truly is one of the most comforting and without a doubt most satisfying foods that I have always taken great pleasure in eating.

Italian Sausage and Lentil Soup

2-3 lg. cloves garlic, finely chopped
1/2 c. or less olive oil
2 c. or less diced Italian sausage (sweet or hot, or mixed), sautéed & fat removed
1 med. onion, chopped
1 carrot, diced
3 c. chicken stock
3 c. water
2 c. lentils (dry), picked over & rinsed to remove any stones (almost 1 lb.)
Salt and pepper to taste

In large, heavy saucepan, sauté the garlic in the oil, over medium heat, for few minutes, careful not to let it brown. Add sausages, stock and water, onions and lentils. Bring mixture to a boil, then reduce heat, cover the pan and simmer the soup for 1-1 1/2 hours, or until lentils are tender. Season with salt and pepper.

Friday, July 17, 2009

Pike and Puppies


The fish were always biting when we were up at our cabin on the lake in Canada. It was nothing for us to catch a dozen or more a day. The bulk of our catch was Northern Pike, wicked little teeth on those suckers let me tell you. My father would clean them by scaling them removing the head and insides and leaving the body and tail in tact. My mother would take all the fish and place them in a big tupperware container pouring an entire bottle of Italian salad dressing on them. My mother would then place the lid on the tupperware and stick the fish in the refrigerator to marinate for a few hours. When dinner time started to roll around my father would fire up the grill to get it nice and hot to cook and char the fish. The Italian dressing not only flavors the fish beautifully but all the little bits of seasoning in the dressing create a wonderful little crust on the skin. While my father was tending to the fish my mother would be in the kitchen preparing one of the many side dishes that would accompany our meal including our absolute must have favorite; Jalapeno hush puppies. They were always crisp on the outside and tender in the middle and that little kick from the jalapeno peppers always added a nice contrast and balance to the sweetness of the fish.

Jalapeno Hush Puppies

1 c. flour
1 c. cornmeal
1 lg. onion, chopped
1 tsp. baking powder
1 tsp. salt
1 tbsp. sugar
1 egg, beaten
1 (17 oz.) can cream corn
2 or 3 chopped jalapenos

Mix as you would for cornbread; if too thick add a little water. Drop into hot deep fat. Dip spoon into hot fat and batter will slide right off. This batter keeps well in refrigerator for several days.

If you would like a more uniform ball shape use melon baller or small ice cream scoop to form the batter.

Photo/brooksba/flickr

Monday, July 13, 2009

Beat Your Way To A Tasty Meal

With all the posts that I have written I always surprise myself that there are some very simple yet well loved foods that I fail to write about. While pondering what food to write about next, out of nowhere I just started thinking about omelets. Beyond it being one of our most popular breakfast choices it's also been that last minute; 'Oh my gosh, I forgot to take something out of the freezer" rescue meal. In my grandmother's case it's become an easy satisfying meal to prepare if you are eating alone. An omelet is a blank canvas totally accepting of whatever foods your imagination can throw at it or better yet in it! My grandmother's favorite omelet is made with chicken livers, my mother loved a good Spanish omelet, I love any omelet that has a lot of melted cheese and then there is my cousin from France who prefers her omelet simply with a sprinkling of herbs and nothing else.
So beat a few eggs, chop up some of last nights leftovers, grab a couple slices of cheese and have a simple yet satisfying meal in a matter of minutes. Food doesn't always have to be fancy in order to taste just fine.

Simple Cheese Omelet Recipe - use this as the base recipe for whatever ingredients you choose (meat, veggie, fish, fruit, cheese). Increase number of eggs and amounts depending on how many omelets and people you are serving.

3 eggs
1 tbsp. milk
1/4 tsp. salt
Dash of pepper
2 tsp. butter
1/4 c. cheese (American, Swiss, feta, cream cheese, cheddar) use whatever you like.

In small bowl, beat eggs, milk, salt and pepper with fork until well blended. In skillet melt butter, tilt pan to coat sides. Add egg mixture and cook on medium heat without stirring.
When omelet is set sprinkle the cheese over half of omelet let sit a few seconds to melt the cheese then slide omelet out of pan and fold in half.

Photo/dinnerologyii/flickr

Thursday, July 9, 2009

You Don't Have To Be Diabetic To Love This Cookbook...A Review

250 Amazing Dishes for People With Diabetes and Their Families and Friends

There was a time when the enjoyment of food accompanied by a diagnosis of diabetes meant a future of the bland and the tasteless. That is what Tom Valenti thought as well upon his diagnosis of Type 2 Diabetes. Like with most of us Tom's best memories of childhood, family and friendships have always been centrally rooted around the pleasure of great food. Food has always been such an important aspect of Tom's life that it carried over into his professional life as well, Tom is a chef.
This cookbook reminds me of the old saying; "When life hands you lemons, make lemonade". Well when life handed Tom a diagnosis of diabetes he made a feast, a feast for all of us to partake in. The title of this book could not be more perfect; "You Don't Have to Be Diabetic to Love This Cookbook"! This cookbook covers everything from breakfasts, snacks, soups, pasta (yes, I said pasta) and how about some nice creamy risotto. It seems like these days whether you are diabetic or not "Carbs" become the enemy. This cookbook will rekindle your friendship with "Carbs" in the most healthy and satisfying way. You'll be able to look desserts straight in the eye again with no pang of guilt whatsoever. How about "Mocha Pots de crème" with shaved bittersweet chocolate, heavy cream and strong brewed coffee, sounds heavenly.
The focus in this book is not on what you can't have but rather on all that you can have in the healthiest most pleasurable way possible for you and your body. Each recipe is broken down nutritionally per serving by calories, carbohydrates, fats, proteins, cholesterol, sugars and sodium.
The most important thing to all people when it comes to eating is flavor and I truly believe that with this cook book Tom has truly saved the best for last. Many of us don't realize while trying to add much needed flavor to our foods through the use of condiments; dressings, sauces, relishes and such the staggering amount of sugar, fat and sodium that is hidden in every little tablespoon that we use. In the last section of this book titled Condiments and Basics Tom covers a wide array of flavoring mediums that are not only concentrated with flavor but also low in fat, sugar and sodium. You will find everything from pesto's to salad dressings, herb purees, broths, relishes and some amazing salsa recipes. More than ever cooking to meet the dietary needs of our family and friends is essential. There was a time when you had to prepare different foods for different people all sitting around the same table a very frustrating and time consuming task. With this cookbook everyone with or without diabetes can partake in the same delicious foods with delight and the comfort of knowing that they have eaten good food that was good for them.
To all my readers out there who love great recipes this book is a must add to your every day use cookbook collection.

Here is just a taste of what you could be serving for dinner tonight:

Angel Hair Pasta
with shrimp scampi sauce

8 ounces of dried angel hair pasta
1/4 cup plus 1 tablespoon of olive oil
8 large cloves of garlic very thinly sliced
1/8 teaspoon of crushed red pepper flakes
1/4 cup plus 2 tablespoons of dry white wine
1 pound large shrimp (about a dozen) peeled and deveined
3 tablespoons unsalted butter
1/4 cup chopped fresh flat leaf parsley

Bring a large pot of water to a boil over high heat. Add the angel hair pasta and let boil until al dente, about 5 minutes.

While the angel hair is cooking, heat the olive oil in a wide deep heavy bottomed pan over medium low heat. Add the garlic and red pepper flakes and cook to gently infuse the olive oil with flavor but not brown the garlic, about 4 minutes. Add the white wine and cook until almost evaporated, about 5 minutes. Add the shrimp to the pan and cook, stirring, until firm and pink, about 3 minutes. Swirl in the butter to thicken and enrich the sauce.

Set aside a few tablespoons of the angel hair cooking water then drain the angel hair. Stir the angel hair cooking water into the pan with the shrimp to bind the sauce, then add the angel hair and toss to coat. Divide the angel hair among 6 bowls or plates. Scatter some parsley over each portion and serve.

This recipe serves 6

Calories per serving 389
Fat 19g
Saturated fat 5g
Trans Fat 0g
Total Carbohydrates 30g
Dietary Fiber 1g
Total Sugars 1g
Protein 20g
Cholesterol 130mg
Sodium 115mg

Friday, July 3, 2009

Have Fun, Just Remember


Happy Birthday America

Every year it comes around No individual party but one big bash Cook outs, time at the beach or lakes Fireworks to light up the sky Parades are held with buntings of Red White and Blue Men and women in uniform march in perfect lock step. Clowns and horses are all abound Children smile and wave the small flags given to them. This is a birthday for our Nation For on July fourth, Seventeen Seventy Six. We proclaimed our freedom to the small world then, that we wanted to become an independent and sovereign nation
Yet, this year we find that Freedom is not free. That our citizens will be far away so another country can be free for they will put their lives on the line for our ideals But they know they will be thought of by those at home For this is the Fourth of July for all to see
A land that knows its freedoms are not free
A land that does not forget our hard kept ideals
A land rich in historyHappy Birthday America

By Merrill Vaughan, Ret. USAF MSgt.
Copyright 2006


Reese's Peanut Butter Bars - an easy pass around dessert

1 c. butter, softened
1 c. smooth peanut butter
4 c. powdered sugar, sifted
1 1/2 c. graham cracker crumbs
6 plain chocolate Hershey bars

Blend butter and peanut butter in a large bowl. Work in the powdered sugar and cracker crumbs with a wooden spoon until combined thoroughly. Press into a 9 x 13 inch pan. Set aside. Melt Hershey bars (10-15 seconds in microwave), spread over peanut butter mixture. Chill until set but don't let get too cold or they will be too hard to cut. Cut into small squares.

Delicious! Tastes just like a peanut butter cup.

Photo/RG/Flickr

Saturday, June 27, 2009

Fragole Pazzo

Isn't it funny how foods that other people grew up eating and loving sound weird but the foods we grew up eating and loving never do? If the food seems weird are the people who eat them and enjoy them just as weird? If that is the case, then just label me the weirdest person on the face of the earth; because I eat some pretty weird foods (my definition of weird is delicious by the way)! If you ask me the only thing that is weird is anyone who would short change themselves of trying something different from their "norm". One little taste that's all it takes, if you don't like it you never have to eat it again.......but if you do like it....
Well I guess that would mean that you are still weird only now you would possess the power to eat many more foods than you use to......how cool is that?!

Crazy Strawberries

2 tbsp. sugar
5 tbsp. balsamic vinegar
1 tsp. freshly coarse ground black pepper
4 c. ripe strawberries, stemmed and quartered (2 pt.)
Grated sweet chocolate for garnish (in a pinch you could just sprinkle on a few semi-sweet chocolate chips)!

In a bowl, combine sugar, vinegar, and pepper. Stir in strawberries and let them stand for 10 minutes, serve strawberries garnished with chocolate.

Monday, June 22, 2009

An Economic Stew

Our grandparents and parents all lived through tough economic times and yet I cannot remember any of them or any of us ever going hungry. Even during some of the poorest times in this countries history most families ate very delicious and substantial meals. They did this by using cheaper cuts of meats or what use to be considered the throw away bits such as innards, knuckles, joints, marrow bones. These cuts always seemed to shine their best when prepared in the form of a soup or stew because the longer the cooking time the more tender and flavorful these cuts of meat became and the amount of servings could be easily expanded just by adding water or stock, different types of vegetables and starches (potatoes, rice, pasta). My mother and grandmother both made this stew even during more prosperous times just for the mere fact that we all enjoyed eating it. I'll admit gizzards are not exactly the most attractive looking meat around but then again how many cuts of meat actually look attractive? Any food, even the nasty bits are beautiful especially when they are prepared by loving hands, shared with a generous heart and sustain us all nutritionally to live another day, love another day and by all means eat another day!

Chicken Gizzard Stew

1-1/2 pounds of chicken gizzards (also known as the giblets)
1 medium onion chopped
2 cloves of garlic chopped
1 large can of diced tomatoes liquid and all
1 small can of tomato paste
1 teaspoon of dried oregano
1 teaspoon of dried basil
1/4 teaspoon of red pepper flakes
Salt and pepper to taste
A little oil for sautéing

Cut up gizzards, some will be small enough to leave as is you are just looking for bite size pieces. Add gizzards, onions and garlic to a large pot set on medium that has just enough oil so mixture won't stick. Sauté for about 10 minutes then add your tomato paste, stir tomato paste into gizzard mixture and using the tomato paste can add three cans of water to the mix and stir. Now add your remaining ingredients, stir, cover and set temperature to low and let simmer for about an hour and a half to two hours. You want your gizzards to get tender since they can be extremely tough to chew.
This can be served up in a bowl with some nice crusty bread and a salad or is great served over rice or pasta.

Photo/A.Curell/Flickr

Wednesday, June 17, 2009

The Dark Side Of Nutrition


For a delicious treat that is high in nutrients and antioxidants we'll have to travel to the dark side. No, we are not meeting Darth Vadar for lunch although eating these might just lighten him up a bit. I guess in some instances even the dark side has a silver lining....enjoy!

Dark Chocolate Cherries

3 ounces of a really good dark chocolate
1 cup of dried tart cherries

Put chocolate in a bowl and microwave for 1 minute stirring halfway through. Remove the bowl from microwave and stir in the cherries. Spread out on a wax paper lined baking sheet and put them in freezer until firm (about 10 min.).

Keep in air tight container in cool place always ready for snacking.

FYI - this works really well with dried blueberries, of course you can dip anything your heart desires, it's chocolate after all!