Welcome

I am constantly amazed at how animated and talkative people get when you mention food. The mere aroma of certain foods can evoke memories that transport us back to a special place and time. Food can bridge the gap between all ages, races and ethnicities.
Let's face it, the only thing that should ever come between people is a table and some serving bowls.

Friday, May 30, 2008

Patty Pan in Never Never Land, A Veggie Tale

Aren’t they cute? The spitting image of their parents Mr. and Mrs. Full Sized Vegetables.
The only problem with these little ones is that they all suffer from the same disorder; Patty Pan Syndrome, they never want to grow up. They refuse to grow up and become mature full grown vegetables like normal vegetable children do and because of this they have all been separated from their parents and now live in the Never Never Land of vegetables which is on a remote shelf in some grocery store far from the mainland shelf of the full growns. The full growns are filled with worry for the safety of their babies for rumor has it that the humans have taken to eating their little ones…….tick-tock, tick-tock oh no! Its Captain Fork we’re doomed.......the end!

Sautéed baby Vegetables

2 tbsp. olive oil
4 baby zucchini, trimmed
4 baby yellow squash
4 baby Patty pan squash
2 baby eggplants, trimmed & halved lengthwise
4 red & 4 yellow cherry tomatoes
1 tsp. minced garlic
1 tsp. finely chopped jalapeno pepper (opt)
4 sprigs fresh thyme
4 tbsp. fresh parsley, chopped
2 tbsp. fresh basil, chopped
Salt & pepper to taste

Heat the oil in a heavy skillet and add the zucchini, squash and eggplant, sauté stirring frequently for about 5 minutes. Add the tomatoes, garlic and jalapeno pepper. Toss and sauté one more minute. Add the thyme, salt and pepper. Sauté another 2 or 3 minutes, stirring almost constantly, sprinkle with basil and parsley and serve.

photo/jess.t/flickr

Tuesday, May 27, 2008

Sweet Savings


The last couple of weeks I have been getting the most gorgeous Vidalia onions you have ever seen from our local farmer’s market. They are huge the size of large grapefruits and they have only been charging three for a dollar. You can find these same Vidalia’s in our local supermarket chains but at 99 cents a pound they are almost a dollar a piece. These days it is almost crazy to by your produce anywhere else.

Vidalia Onion Quiche

1 cup cracker crumbs (any kind)
5 teaspoon butter, melted
2 1/2 cups of Vidalia onions, thinly sliced
1 teaspoon olive oil
3/4 cup milk
2 eggs, beaten
1/2 cup Swiss cheese, shredded
Salt and Pepper to taste

Crust:

Combine cracker crumbs and melted butter. Press firmly into a 9 inch pie.
Bake at 350°F for 10 minutes.

Filling:

Sauté onions over medium heat in olive oil until translucent.
Spread onions evenly across baked pie crust. Combine milk and eggs; pour over onions. Sprinkle with cheese; season with salt and pepper.

Bake at 350°F for 45 minutes. Remove from oven, and cool 10 minutes before serving.

Friday, May 23, 2008

Manzo Italiano

You’ve got your Arby’s roast beef, you’ve got your Philadelphia cheese steak, you’ve got your local steak bomber …….and then you’ve got the Godfather of them all; The Italian Beef”! The Italian beef is different from all the others because it cooks all day long. The beef becomes quite tender while absorbing much of the cooking liquid, leaving the meat loaded with flavor.
Too time consuming to make at home you say; fuggetaboutit. We can either do this the hard way or nice and easy like the recipes says….Capisce?

Italian Beef

3-4 lb. beef roast (inexpensive cuts work well with slow cooking such as chuck roast, bottom round or flank)
2 cans beef broth
1 packet Good Seasons Italian dressing (Zesty gives more flavor)
1- 16 oz. jar of pepperoncini’s (may put in whole or halved length wise, just remove the stems and seeds).

Mix all together, including brine from peppers. Cook all night or day if you prefer in oven set at 200 or in crock pot set on low for 7 to 8 hours. Chill to skim off fat (or feel free to leave the fat and enjoy right away), if chilling just reheat then slice or shred beef and serve on buns or a good hearty French or Italian style Bread (do not forget to drizzle some of that broth onto the bread or dunk it just like you would a French Dip sandwich with au jus).
Tastes great just as is but if you need to dress it up here are some suggestions.

Topping ideas:

Cheese (any)
Giardiniera (Italian pickled vegetable mix) you’ll find in next to the pepper
Roasted bell peppers
Fried onions
Condiments

Photo/iancarvell/flickr

Wednesday, May 21, 2008

My Little Polish Dumpling

I have had a great many requests lately for some traditional polish recipes. The recipe that seems to be at the top of everyone’s list is pierogi, which is just fine with me as it is one of my all time favorite polish dishes. As luck would have it I am fortunate enough to have an old recipe that has been passed from one kitchen to another for generations, each mouthful brings back joyous memories.

Polish Pierogi

Dough:
4 cups of flour, sifted
1 egg
1/2 tsp. salt
1 cup of milk or water

Sauerkraut Filling:
1 lg. can of sauerkraut
1 med. onion, diced
4 slices bacon or salt pork, diced

Potato and farmer cheese filling:
5 or 6 med. potatoes
1/2 stick butter
1 med. onion, diced
1 - 1 1/2 lbs. of farmer’s cheese (may use other cheese) but farmer’s cheese is more traditional.

Dough: Mix egg, salt and milk or water gradually adding flour while stirring to form stiff dough. Turn onto floured board and knead as for bread. Roll dough into ball, place into plastic bag in refrigerator to chill while filling is being prepared.

Fillings:

Sauerkraut: Place sauerkraut in pan, cover with water and bring to a boil. Simmer for 5 minutes, drain, rinse and squeeze out all the water. Place sauerkraut, onion and bacon or salt pork in a frying pan. Fry until browned adding a little oil if bacon is lean, set aside to cool.

Potato and Farmer's Cheese Filling: Prepare potatoes as for mashed potatoes. In separate pan while potatoes cook sauté onion with butter until tender. To prepared potatoes stir in onion mixture and farmers cheese, blend well.
Roll dough 1/2 at a time on floured board. Cut into circles with a glass or doughnut cutter. Roll each circle again maintaining circle shape to approximately 1/2 its size again. Place filling in each circle enough so that it can be folded in half without overflowing. Travel around edge on both sides with a fork or use your fingers to crimp and seal. Drop into simmering water until each pierogi floats. Place in refrigerator or container in freezer until ready to serve.

Serving Suggestions: Pierogies may be boiled or lightly fried in butter and topped with your choice of caramelized onions, cut up kielbasa, crumbled bacon. Cabbage and or beets make a wonderful side dish.
Some people even enjoy them with a splash of vinegar!

Photo/agata/flickr

Sunday, May 18, 2008

Chicken Ala Tile


Yesterday would have been my mother and father’s 50th wedding anniversary if they had not divorced 28 years ago. I know it sounds sad but it’s really not, they are better friends now than they never were married…….Out of respect for them and for all of you as well I will leave out all the nasty bits and private details.
Let me just put it this way; “We can still love roses and hate being pricked by the thorns all at the same time”….I just realized how much a rose symbolizes the perfect metaphor for life.
Anyhow, on a some what lighter and much less philosophical note, my mother was thinking back on their marriage and asked me if I remembered the “Chicken Ala Tile” story? Well of course I did, it was really funny in a strange sort of way given the circumstances back then. My father was watching his weight, which actually translates into that my mother was watching his weight, if you get my drift. He was only to eat chicken or fish, two vegetables and the chicken or fish had to be broiled. Back then we had one of those little counter top broiler ovens where my mother carefully placed the chicken to cook. While that was broiling away she made the vegetables that would accompany the chicken getting more and more frustrated by the minute with all his bellowing and barking in the background…..poor Mom! I was setting the table and he was in the living room which was right off the kitchen having a scotch and watching the news. My mother walked over to the counter to turn the chicken and when she pulled the handle of the broiler pan, the handle broke and the chicken went spilling on the floor. Totally frustrated and angry my mother grabbed the chicken threw it back in the pan and shoved it back under the broiler and proceeded to wipe off the kitchen tile. My mother just looked at me and I silently understood. We sat down for dinner; my mother asked my father how he liked the chicken? He said it was good; did she do something different to it? She said no, I cooked it the way I always do while winking at me and grinning.
So here is a broiled chicken recipe to enjoy in honor of this story, throwing the chicken on the floor is optional!

Broiled Chicken

1/2 chicken, cut in 4 pieces
2 tbsp. olive oil
1/2 tsp. oregano
2 tbsp. water
Juice from 1/2 lemon

Put chicken in a pan with salt and pepper. Combine oil, water, oregano, and lemon juice in a cup. Beat lightly with a fork. Pour the combined ingredients over the chicken. Place chicken under the broiler and broil for 10- 15 minutes, then turn over and broil on the other side until nicely browned.


photo courtesy of JoJoBear99/flickr

Thursday, May 15, 2008

What On Earth Is She Doing?

Funny but true…..A friend and I decided to treat ourselves to a really nice dinner at a steak and seafood house. We decided to do the whole nine yards; “Drinks, appetizers and dessert”. We both ordered prime rib as our main course with all the fixings, baked potato, soup and salad. The waiter placed a gorgeous basket of warm bread on the table which we both grabbed for immediately. As we talked and ate making our way closer to the main entree` the waiter placed a little cup that contained a creamy yellow scoop of something inside. I instantly grabbed my spoon to start eating while my friend grabbed her butter knife and a dinner roll while we both looked at each other stunned and confused by the others actions. My friend said to me with a tiny bit of disgust; “Why are you eating that butter with a spoon”? Then I laughed and said; “Why are you about to butter your roll with lemon sorbet”? Needless to say we both howled with laughter and my friend will never again reach for a knife during the Intermezzo!

FYI
Intermezzos are usually a small amount of something light and refreshing to cleanse the palate between the courses of a rich meal. Usually intermezzo comes in the form of a sorbet, quite often lemon or lime. There are some restaurants that serve a light wine as their intermezzo on the order of an Italian Prosecco which is light and bubbly.


Easy Lemon Sorbet

The juice of 12 Lemons
1 Tablespoon of lemon zest, yellow part only
2 cups of sugar dissolved in 2 cups of water

Load all ingredients into an ice cream freezer and run it for 20 to 30 minutes until you have thick thoroughly frozen slurry. Scoop the slurry into a plastic container and put it into your freezer until frozen hard. Scoop and serve in small cup, bowl or better yet wine glass. Remember to use only a small scoop, this is merely to cleanse the palate save the bigger scoops for when serving as a dessert.
Kphua/Flickr

Monday, May 12, 2008

What's That Unusual Smell?

While spending time with my mother yesterday, looking at photo’s and reminiscing, my mother recalled a funny story. My mother also felt that it would be a great story to post on my blog……so here goes:

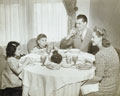
Almost 20 years ago at a family picnic where each person brought a dish to pass, my mother decided to make what she called her;” Garbage Macaroni”. Not the most enticing name for something that one would put in their mouth but despite the name it was always a big draw with family and friends. I think it should have just been called everything but the kitchen sink macaroni because she literally put in just about everything she had on hand into it. When finished this thing weighed a ton, my mother had to put it in one of those big foil turkey roaster pans. This macaroni contained all kinds of assorted meats, vegetables, seasonings not to mention a variety of cheeses, it really was delicious. You actually do not need anything else when serving this dish; it already has your meat, your veggie and your starch.
Now to the funny part, when the picnic ended and everyone was taking their care packages home my mother still had almost half a pan of her garbage macaroni left.
Since I was going through some lean times she asked if I would like to take the rest of it home, I immediately replied yes. This would have given me about a weeks worth of meals which would have helped me greatly, so my mother said good and proceeded to wrap it up for me. Due to its size and a shortage of saran wrap or foil my mother decided to tie it up in a garbage bag, I didn’t have far to go and I could repackage it when I got home. I was so excited when I got home, I got out my plastic containers and lined them up on the counter but as I started to remove the pan of macaroni from the garbage bag I smelled something oddly familiar. It smelled just like lemon dishwashing liquid the only problem was is that I didn’t use lemon scented dishwashing liquid. I stirred the macaroni and sniffed again and it still smelled, then I tasted it and it even tasted like some bad lemony something. I called my mother and said I don’t know what happened but there is no way I can use this macaroni as much as it kills me I am going to have to throw it all away. My mother couldn’t understand how that could have happened until she cleared out her bag from the picnic and pulled out the box of Lemon Potpourri Scented Garbage Bags……..giving her Garbage Macaroni a whole new meaning!

Harriet’s Garbage Macaroni (Ingredients and amounts can vary, depending on how many you are serving and what you have on hand).

1 lb. Italian sweet sausage (turkey sausage works great)
1/2 pound of sliced or chopped pepperoni, optional
1 pound of hamburger, optional
(Cubed up cooked ham also works nicely in this)
1 cup of ricotta cheese, optional (if using, just smear a little between layers)
3 green peppers, chopped2 onions, chopped
2 Large cloves of garlic, chopped1 (28 oz.) can crushed tomatoes1 (6 oz.) can tomato paste1 (8 oz.) can tomato sauce2 cups of water2 pounds of macaroni (any)
12 oz. shredded Mozzarella cheese
12 oz. of cheddar1/4 cup of grated Parmesan cheese
1/4 cup of grated Romano

Remove sausage from casings and crumble. In large deep skillet or dutch oven, fry sausage until crumbly and (hamburger if using). Add green peppers, onions and garlic sauté for 5 minutes, do not drain. Stir in tomatoes, paste, sauce and water; simmer stirring occasionally for 10 minutes. Remove from heat. Cook macaroni according to package directions, drain. Cover bottom of deep roasting or lasagna pan (foil turkey roasting pan works great) with sauce. Layer macaroni, sauce/meat mixture and cheeses ending with the macaroni. Pour remaining sauce over. Sprinkle Parmesan and Romano cheese over top. Bake in preheated 400 degree oven for 25 to 30 minutes or until bubbly and brown.

photo/courtney_clove's/flickr

Wednesday, May 7, 2008

Memories Can Grow Like Weeds

Italians do love their bitter greens so much so that they would spend full days in a field somewhere picking them. I know this only because from the time I was a small child my grandmother and great aunts put a little weed puller in my hand and taught me the fine art of dandelion picking. It really didn’t seem like work, it was fun being with them and listening to their stories of the past. The time would fly by and before you knew it we were heading home with bags and bags of dandelions to clean. My grandmother loved to use them for salads but they were also great fried with a little garlic. This particular recipe was created for two reasons the potatoes were a way to stretch the dandelion greens (they have a tendency to cook down to nothing) and the other reason was that the potatoes would mellow out their bitterness.
For some folks dandelions are not a welcoming sight, they are just a nuisance weed ruining their beautiful lawns. For us they are a welcoming sight that stirs up memories of good times spent with loved ones and of the traditional foods that we enjoyed as a family.

Dandelion Greens and Potatoes

12 cups of cleaned dandelion greens
2 cups of diced potatoes
5 Tablespoons of Olive Oil
3 cloves garlic, chopped
Hot pepper flakes to taste
Salt to taste

Boil greens with potatoes about 5 minutes, drain. Heat oils in a skillet, add garlic and hot pepper. As soon as garlic takes on color, add greens and potatoes, 1 cup of liquid they were boiled in, and salt. Simmer 20 to 30 minutes. Mash with fork and add more oil, if desired.

Photo Courtesy of YellowHammer/Flickr

Monday, May 5, 2008

A Natural Beauty


There are certain times in life when it is okay to do less in order to achieve more. This little rule of thumb may not do well in the outside world but it certainly does well in the kitchen. When cooking, we all have a tendency to add a little of this and a lot more of that in the hopes of heightening the flavors of the foods we are preparing. It’s a great method that produces some of the best meals ever eaten but once in awhile you have to stand back and allow a singular ingredient center stage.
Just as less make-up brings out the natural beauty of a person, using fewer spices accentuates the natural beauty of, a cherry tomato.

Sautéed Cherry Tomatoes
Photo/PixieDust/Flickr

2 tbsp. olive oil or butter
1 pt. cherry tomatoes, whole (you may halve but they look great whole)
Salt & freshly ground black pepper, to taste

Optional additions; “garlic, basil or thyme”

Place the olive oil or butter in a small heavy skillet and place over medium heat. Toss in the cherry tomatoes, sauté, tossing now and then, for 3 to 4 minutes or until the tomatoes are just heated through.

Thursday, May 1, 2008

A Slice of Spring

There was this house at the corner of the street where I grew up that had this little side yard completely filled with rhubarb. They really were quite pretty to look at with their big green leaves and vibrant red stalks just swaying in the breeze. The cutest little couple lived there; we called them Mr. and Mrs. Joe (never knew their last name). Mrs. Joe made so many wonderful things with her rhubarb and she was always kind enough to share with all of us. When strawberries started to look good and ripe that is when Mrs. Joe would make her magically flaky pie crust and cut some of her specially grown rhubarb to make this incredibly delicious pie.

Mrs. Joes Strawberry-Rhubarb Pie

1 1/4-1 1/2 cup sugar
3 Tablespoons of cornstarch
1/4 Teaspoon of salt
1/4 Teaspoon of ground nutmeg
3 cups of rhubarb, cut into 1/2" pieces
2 cups sliced fresh strawberries
1 Tablespoon of butter

Pastry for double crust pie:

2 cups of sifted flour
1 Teaspoon of salt
3/4 cup of shortening
3-5 Tablespoons of ice cold water

Combine flour and salt in mixing bowl. Cut in shortening until the consistency of coarse cornmeal. Sprinkle on water, 1 tablespoon at a time, until it holds together when pressed gently but not sticky. Roll out between waxed paper. Makes:
2 crusts for 8 or 9 inch pie

Strawberry-Rhubarb Filling:

In large mixing bowl stir together sugar, cornstarch, salt and ground nutmeg. Add rhubarb pieces and sliced strawberries, toss gently to coat fruit. Let stand for 15 minutes.

Meanwhile, prepare and roll out pastry. Line a 9 inch pie plate with half of the pastry. Trim pastry to edge of pie plate. Pour fruit mixture into pie plate, dot with butter, place pastry on top of filling. Cut slits in top to allow steam to escape seal and flute edge. Bake at 350 degrees for 1 hour.


Lea/flickr